View Element ADA Object Information
The Object info sub-panel in the Element Details panel displays the object information of the Sigmafine ADA for the selected Element.
To view the object information of the ADA with which an Element is associated:
Open the Element Details panel.
Click on the Object info down-arrow to expand the ADA object information.
Element Details - Object info panel (closed)

The panel expands to display the following sections:
- Attribute
- Inputs
- Outputs
- Balance Summary
Object info panel (expanded)
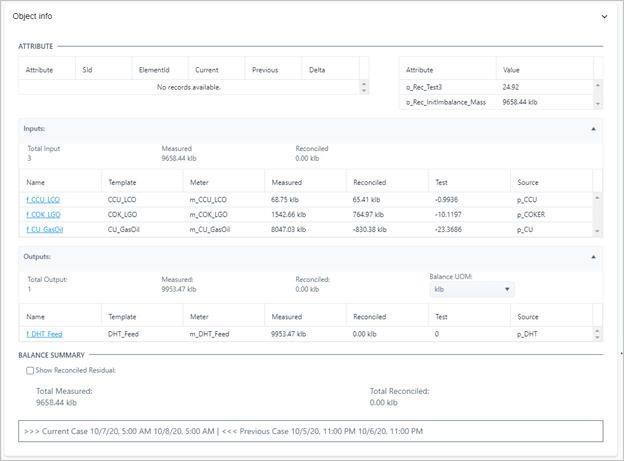
The details for each section shown in Figure 2 are described in the following table.
Element ADA Object Information Details
Detail Description Attribute The Attribute sections contains the Element Attributes with the category BA_GetInfo_Attributein the associated template.
Information for the current Case, the previous Case and the Delta between the Cases, are displayed.
ADA Object info Panel - Attribute section
Inputs The Inputs section contains a table that shows the flows and transactions for point of balance objects (Processes, Nodes, Tanks) that are the inputs of the Element.ADA Object info Panel - Inputs section panel 
Outputs The Outputs section contains a table that shows the flows and transactions for point of balance objects (Processes, Nodes, Tanks) that are the outputs of the Element. Note: The Balance Data Unit of Measure defaults to the UOM configured on the reconciled imbalance attribute. You have the ability to change this UOM in the ADA Outputs sub-panel.
ADA Object info Panel - Outputs section panel
Balance Summary The Balance Summary section summarizes the balance results of the reconciliation. Show Reconciled Residual checkbox: When checked, this checkbox lets you display the effective Reconciled Residual calculated by Sigmafine (that value has no unit of measure).
ADA Object info Panel - Balance Summary tip
tipYou have the ability to update the ADA Object information with the data related to the selected element. See step 8 for instructions.
To open (or re-open) a sub-panel, click its title bar down arrow.
To close (or re-close) a sub-panel, click on its title bar up arrow.
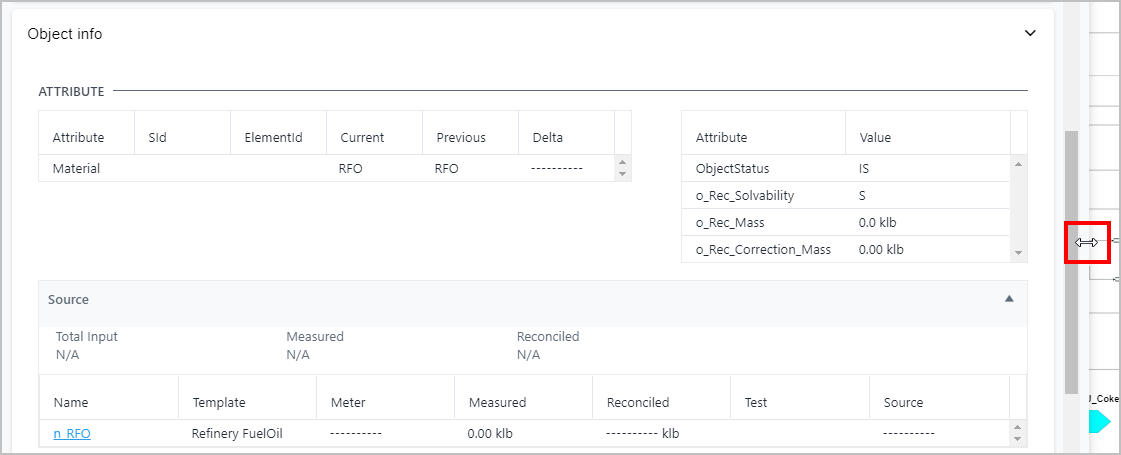
(Optional) To resize the ADA Object info panel:
a. Hold down your mouse button over the right side of the panel. b. When the mouse pointer changes to a double-sided arrow (as shown in the following figure), drag your mouse to the right to increase the panel size (drag it to the left to decrease the panel size).
Panel resizing
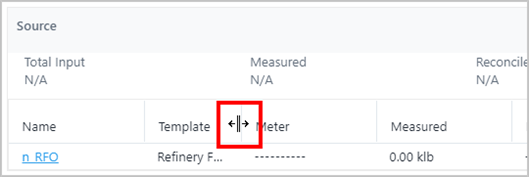
(Optional) To resize the width of a column to view make all data and the header title visible:
a. Place your mouse over the right side of the column.
b. When the pointer changes (as shown in the following figure), hold the mouse button down and drag to the right to increase the column size (drag to the left to decrease it).
ADA Object info sub-panel - column resizing
To change the configured Unit of Measure, click on its Balance UOM down-arrow and select the UOM you want.
In both the Inputs and Outputs sub-panels, the ADA object information is updated according to the selected Unit of Measure.
To update the ADA object information, click on the Input or Output Name.
The sub-panel refreshes to display the Source and Destination for the selected object (as shown in the following example).
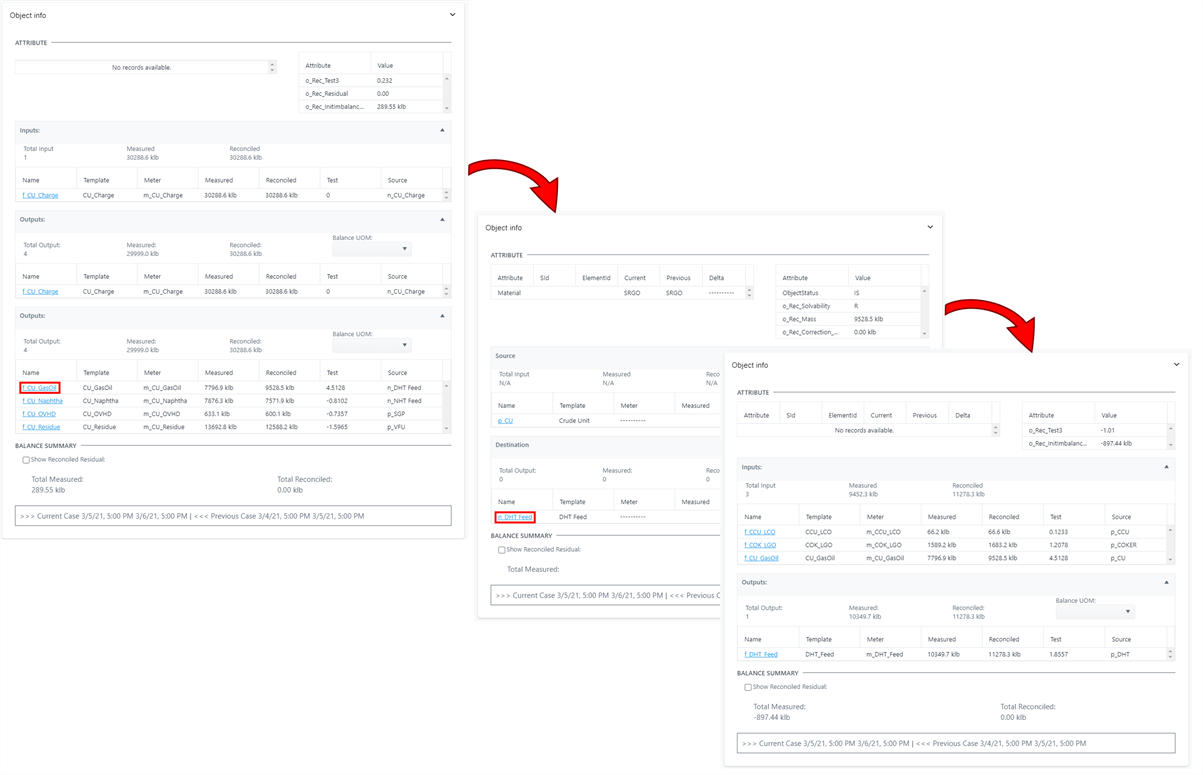
By clicking on the input or output Name, the ADA automatically updates displaying the information of the selected element. Clicking on the Name again, you can navigate the model (as shown in the following example). The Pin of the selected element is also updated on the Display, to highlight the current selection.
EXAMPLE: ADA Object info sub-panel Object Update
The following images provide a view of what is displayed in the sub-panel after you have clicked on an object Name. Note that the data in the sub-panel is replaced with the new data as opposed to an additional panel opening.
ADA sub-panel, update the ADA object