Adjustments and Results Summary
SFHub Visualizer allows to view the summary of the adjustments and case results collected into the selected case.
The information is available by opening the Adjustments and Results Panel.
Starting from SFHub 3.0.4 the Adjustments and Results Panel allows to clear all case adjustments as well as reset all the case results.
To view a summary of the adjustments and results for a case:
Click the Adjustments and Results Panel button in the Display status bar.
Adjustments and Results option - SFHub v. 2.x

Adjustments and Results option - SFHub v. 3.x

The Adjustments and Results Panel opens to the Adjustment tab.
Adjustments and Results panel - Adjustment tab
- The Adjustment tab shows any adjustments made on the current Sigmafine Case.
- The Results tab shows the list of the input and output results collected in the current Sigmafine Case.
To switch between the two tabs, click on the tab you want to view.
(Optional) To switch to the Results list, click on the Results tab.
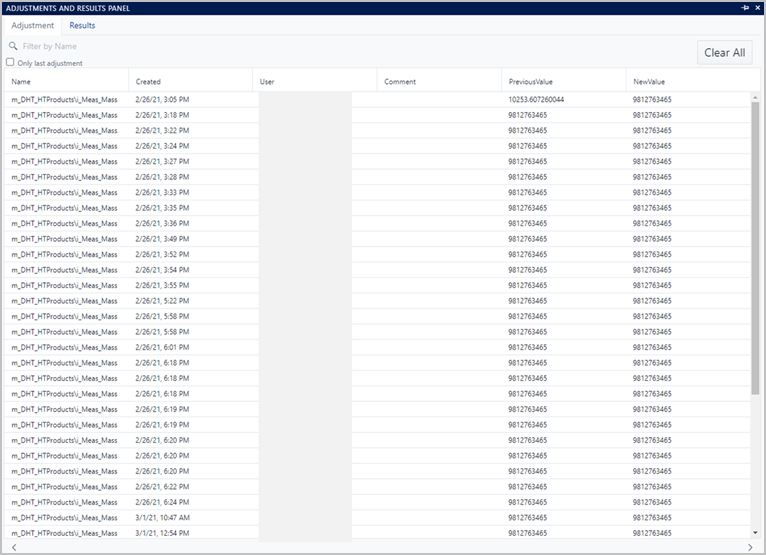
The Adjustment Results are displayed.
Adjustment and Results panel - Results tab
(Optional) Use the

 sibling buttons at the bottom of the list to cycle forward and back
through a list that spans multiple panels.
sibling buttons at the bottom of the list to cycle forward and back
through a list that spans multiple panels.
Clear all Adjustements
The Adjustments tab makes availabe the Clear All button that allows to clear all adjustments created in the current case.
Adjustment and Results panel - Clear All
![]()
The clear of a single adjustment is not supported in this panel. To clear a single adjustment of a well defined attribute you can use the Element Datails panel of SigmafineHub Visualizer. (see View Attribute Adjustment History)
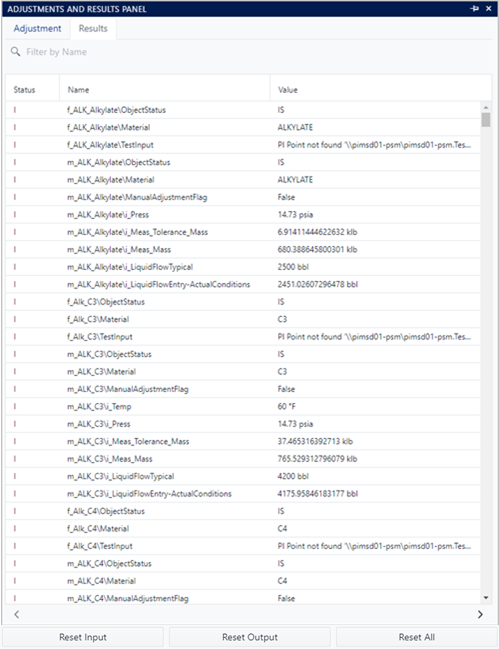
Reset all Results
The Results tab makes availabe three buttons that allow to reset the results of the current case.
Adjustment and Results panel - Reset Results

| Button | Description |
|---|---|
| Reset Input | It allows to reset all input results created in the current case. |
| Reset Output | It allows to reset all output results created in the current case. |
| Reset Output | This button resets all the inputs and outputs of the case. |
The reset result buttons don't clear the results on the attributes where adjustments are in place. In such case, you must clear the adjustments before to reset the results.
The reset of a single result is not supported in this panel. To reset a single result of a well defined attribute you can use the Element Datails panel of SigmafineHub Visualizer. (see View Attribute Adjustment History)
Filter by Name
Both the Adjustment and Results lists can be filtered by name, to narrow the scope of the table to a subset of elements and attributes. Each Adjustment and Result name is composed of the element name followed by the '\' character and then the name of the attribute where the adjustment or the result has been created.
The filter works by searching all the adjustments / results having the name staring with the specified string, for example:
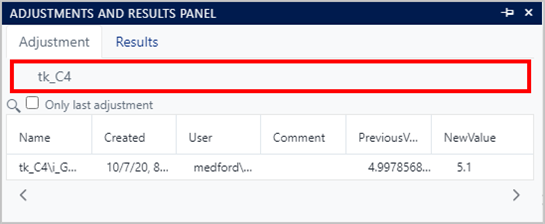
- If the filter by name contains the string 'tk_C4', then all the adjustments or results created for the elements whose name starts with or match with the string 'tk_C4' will be shown.
- If the filter by name contains the string 'tk_C4\i_', then all the adjustments or results created for the element named 'tk_C4' and the attributes whose name starts with 'i_' will be shown.
To filter a list by name:
Click Filter by Name and type part or all of a specific name to filter on.
Press enter (on your keyboard).
Filter by name example
The cases are filtered by the name, with the most recent date range at the top and the oldest date range at the bottom.
(Optional) Use the
sibling buttons at the bottom of the list to cycle forward and back through a list that spans multiple panels.
Sort Column by Ascending or Descending Order
The Sort feature is only available for the Adjustments list.
To sort a column in ascending or descending order:
Locate the header for the column you want to sort.
Click on the header name to sort by the next available sort order, which is based on the current order in which the column is being sorted. Following are the two states of the sort order:
 Sorted in ascending order.
 Sorted in descending order.
The sort feature works like a two-way toggle in that each click selects the opposite setting.
EXAMPLE: List sorted by 'Created' date in ascending order
List sorted by 'Name' in ascending order

(Optional) Use the
sibling buttons at the bottom of the list to cycle forward and back through a list that spans multiple panels.