Adding a New Flow Element to a Model
When you drag a flow template, a global/local Element is created depending on the 'Modeler Preferences' settings.
The following is an example of a flow element, since a flow is a type of element (a 'Flow' type) follow the same general procedure applies, as described in Adding a New Element to a Model.
To add a flow element:
Open AF Browser.
Click on the Templates tab.
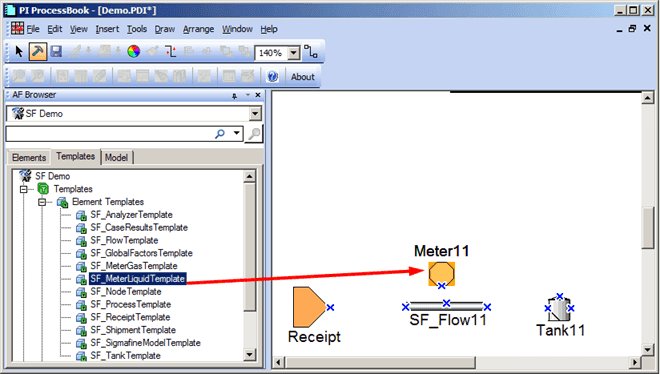
Select the flow template you want to use as the basis for your new flow element.
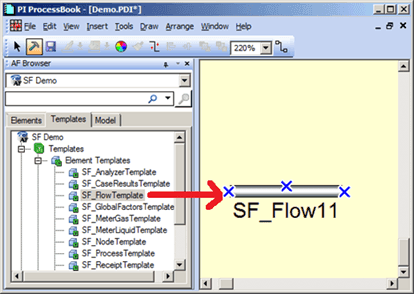
Drag the flow template to the display (as shown in Figure 841).
The AF Property window opens.
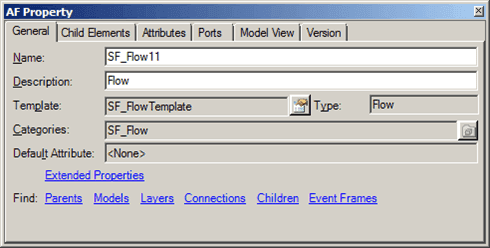
In the Name box, type a unique name for the new flow element.
(Optional) In the Description box, type a short description for the new flow element.
All other tab's options default to those of the flow template you selected to create the new flow element.
Change whatever other options you need to under the other tabs.
For information regarding the options under the other tabs, see Element Properties - Child Elements Tab, Element Properties - Attributes Tab,Element Properties - Ports Tab, Element Properties - Model View Tab and Element Properties - Version Tab.
In the AF Browser window, right-click on the new flow Element and select Check In, to finish adding it to the database.
This checks in only this element ( the new Flow element); no other changes pending for the database are checked in. Either check in any pending changes to the template prior to checking in the element, or use the AF Check In option from the File menu to check in all pending AF changes.
Similarly, you can create a 'Receipt Point' and a 'Tank' Element on the display by dragging and dropping their templates, and then filling in the necessary changes as listed in steps 5 through 7 above. Then use one of the Check In methods to check in the new elements.