Grant Pumper's Log Permissions
After TES users (Operators) have been defined and assigned to their respective groups, the Operator users may need to be given access rights and permissions to the Pumper's Log. This involves granting access and permissions to the database, specifically in the Tables section.
Permissions for All Tables in the Database
To grant users access and permission to all the tables in the database:
Open the System Explorer and choose the database to which you have connected TES.
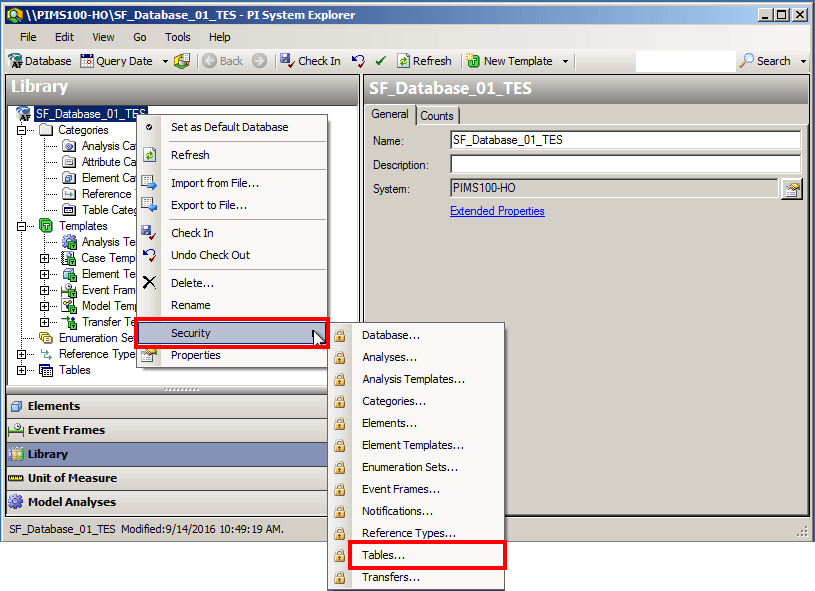
Right-click on the database name and select Security > Tables.
The Permissions for [database name] window opens.

Click the Add button.
A Select Users or Groups window opens.
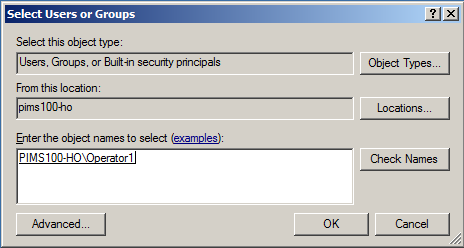
In the box at the bottom of the window, add the user's name.
You can click the Check Names button to ensure that you have entered the name properly.
Click OK to add the user and return to the database permissions window.
The user you selected is now displayed in the 'Group or user names' box, as shown in the following figure.
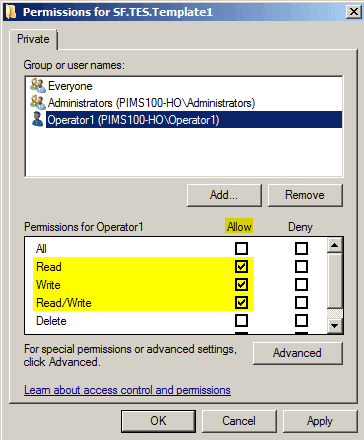
In the Group or user names box, select the user name you just added.
In the Permissions for [user name] box at the bottom of the window, check the Allow checkbox for the following permissions:
- Read
- Write
- Read/Write
Click OK to save your selections and close the window.
You are returned to the System Explorer window.
You now need to apply an Advanced permission to the name you just added. To do this, you need to reopen the Permissions for Tables window.
Repeat steps 1 and 2 to open the Permissions for Table window again.
In the Group or user names box, select the user name you just added.
Under the Permissions for [user name] box, click the Advanced button.
The Advanced Security Settings for Tables window opens.
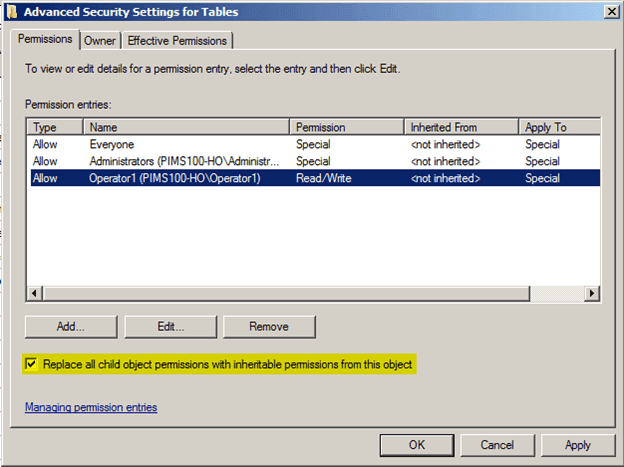
Check the Replace all child object permissions wit inheritable permissions from this object checkbox.
A Windows Security message displays.

Click Yes to continue with the replacing of explicitly defined permissions on all descendants with inheritable permissions from the Tables.
The message window closes and you are returned to the Permissions for Table window.
Click OK in the Permissions for Table window to close it.
The next step is to grant the users permissions to specific tables.
Permissions for Specific Tables in the Database
To grant users access and permission to specific tables in the database:
Open the System Explorer and choose the database to which you have connected TES.
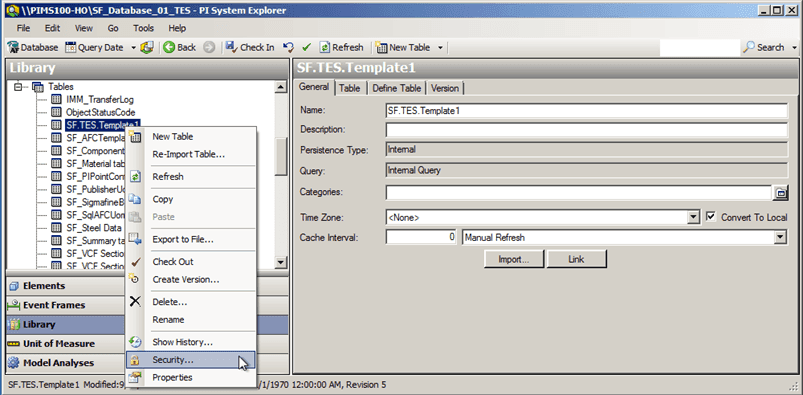
Expand the Tables list.
Right-click on the SF.TES.Template1 table and select Security.
The Permissions for SF.TES.Template1 window opens.
Click the Add button.
A Select Users or Groups window opens.
In the box at the bottom of the window, add the user's name.
You can click the Check Names button to ensure that you have entered the name properly.
Click OK to add the user and return to the database permissions window.
The user you selected is now displayed in the 'Group or user names' box, as shown in the following figure.
In the Group or user names box, select the user name you just added.
In the Permissions for [user name] box at the bottom of the window, check the Allow checkbox for the following permissions:
- Read
- Write
- Read/Write
Click OK to save your selections and close the window.
You are returned to the System Explorer window.