Edit the TES.Connections Table
The TES.Connections table identifies each group name along with every element that can server as a source within that group and the destination that can be connected to each source element.
Each connection (meaning, one source connecting to one destination) resides in its own row. If a source has multiple destination possibilities, a new row is used for each individual destination. For example; if there are four possible destinations, their are four rows displayed for the same source, with each row containing one of the different destinations.
When a group is selected in TES, you are allowed to select only those source elements that are identified as a sources within the group. After selecting a source, the destination element list is further filtered to only allow the selection of an element that is defined as belonging to the group and as being a possible destination for the selected source element.
To edit the TES.Connections table:
In the TES tree, click the TES Tables expand icon, to expand the list of tables.
Click on the TES.Connections table to open it.
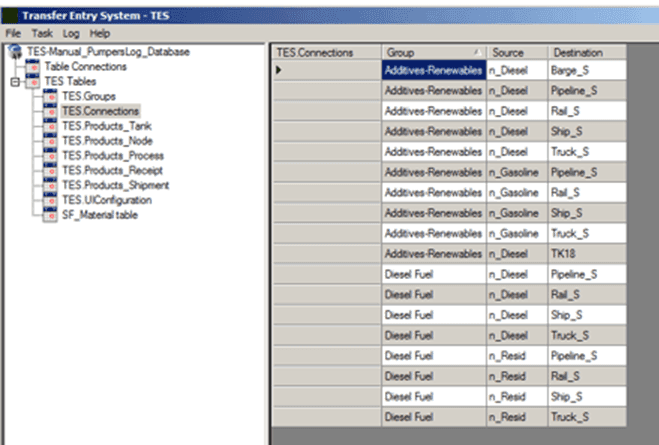
This table displays three columns; Group, Source and Destination. For every group there is at least one source, and for every source, at least one destination. Though you can have multiple destinations for a single source in a single group. The most important distinction to remember about this table is that each each row equals one connection (one source connecting to one destination).
To add another connection to the table:
In the Search By section, select the Group option.

Click on the Search By box down-arrow and select the group you want to add to the connection.
Click the Show button.
A Selected Items window opens.

Click on the Source down-arrow and select the source element for the connection.
Click on the Destination down-arrow and select the destination element for the connection.
Repeat steps d and e for each connection you want to include in the selected group.
Note: Only elements included in the group appear in the source and destination selection menus.
When finished making your selections, click OK to save the new connection(s) to the TES.Connections table.
To view the connections allowed for an element:
In the Search By section, select either the Source or the Destination option, depending on which you want to search on. In our example, we selected 'Source'.

Click on the Search By box down-arrow and select the element.
Click the Show button.
A Selected Items window opens, displaying either the Group and Destination connections for the selected element, or its Group and Source connections, depending on which search you performed.
Searched by 'Source' Searched by 'Destination' ![Figure 1746: TES.Connections - Search By - Source results Figure 1747: TES.Connections - Search By - Destination results Note: You cannot add connections via the above windows. If you want to add or edit the connections, you must do a search by 'Group'.