Configuring - Floating Roof Adjustment (Method 2)
This configuration can be done at the template or individual Element level. The example procedure shown below is done at the template level.
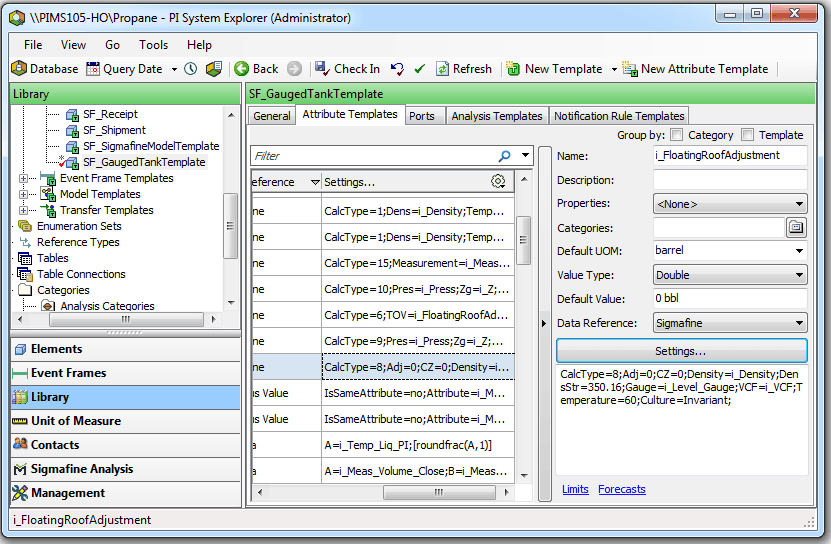
In the System Explorer navigation pane, click on Library.
From the Templates > Element Templates tree, select the tank template (i.e., SF_GaugedTankTemplate).
Click on the Attribute Templates tab.
In the Name column, select the Attribute for the floating roof adjustment (i.e., i_FloatingRoofAdjustment). Note that you can also type the name into the 'Name' box, as indicated in Figure 548.
In the Data Reference column select Sigmafine.
Click the Settings button to open the Sigmafine Data Reference window.

Under Calculation Category select Tank Inventory.
Click Next.
The Tank Inventory window opens.
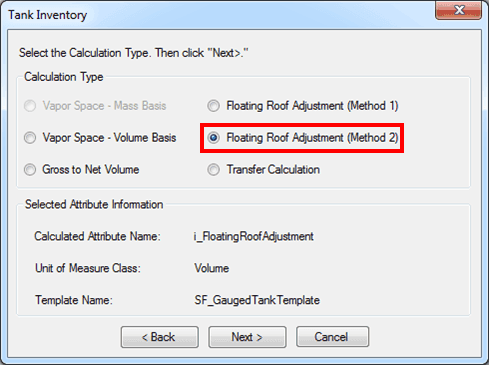
Select Floating Roof Adjustment (Method 2).
Click Next.
The Floating Roof Adjustment (Method 1) window opens.
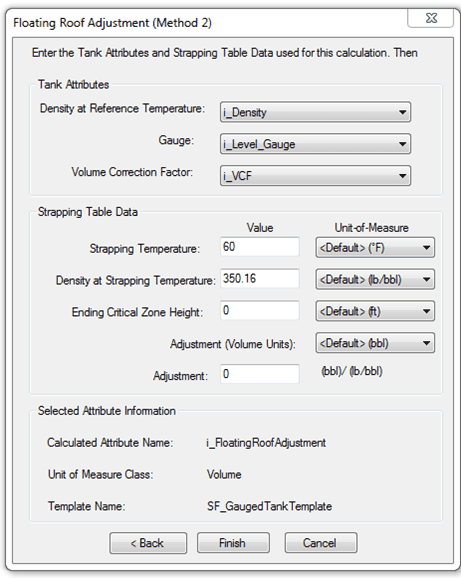
Using the following Tank Attributes table, select the Tank Attributes
Using the following Strapping Table Data table, select the Strapping Table Data.
Tank Attributes
Input Box / Button Description Density at Reference Temperature Select attribute; units of density. Gauge Select attribute; units of length. Volume Correction Factor Select attribute; (dimensionless). Strapping Table Data
Input Box / Button Description Strapping Temperature Enter a temperature; choose the corresponding unit of measure. If no strapping temperature is selected, a temperature of 60 is used. Density at Strapping Temperature Enter a density; choose the corresponding unit of density. Ending Critical Zone Height Enter a height; choose the corresponding unit of length. Adjustment Enter volume adjustment per unit of density. Select the unit for volume portion of this adjustment. When finished, click Finish to complete the configuration.
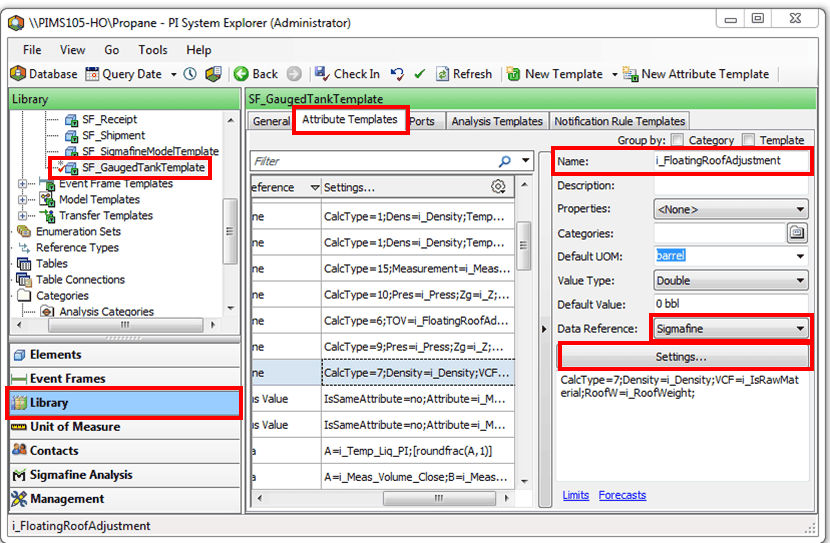
The following sample displays the configuration in the System Explorer window.