Assign/Unassign Reports
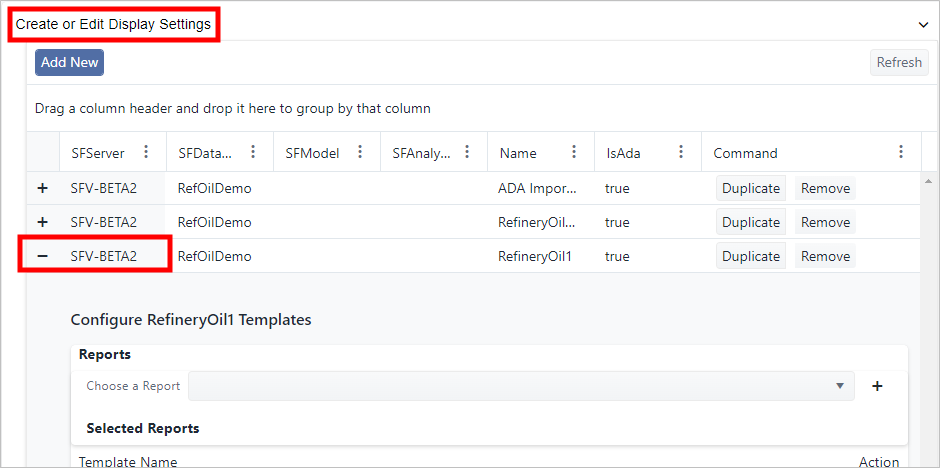
The Create or Edit Display Settings panel, allows to assign reports to be made available in the context of the SFHub Visualizer display as well as unassagnig reports previously configured.
When you expand a Display Settings listed in the Create or Edit Display Settings panel, a Reports drop-down allows to select from a list of reports created in the SFHub Studio Projects referencing the same Sigmafine context of the selected Display Settings. The available reports are based on the following:
Reports owned by the user configuring the display settings
Reports that were made public by their owner
Reports shared by the owner with the user configuring the display settings
When configuring reports in a display settings created by the SFHub Admin, you have to take care to assure that each report has the sufficient shares in order to make it available to each SFHub user that decided to use this display setting defined by the Admin.
The following sections topics provide steps on how to assign and unassign reports.
Assign a Report
When you want a report to be available to all displays using a specific Display Setting in SFHub Visualizer, you can assign the report at the Display Settings level.
To assign a report to a Display Setting:
Open the Create or Edit Display Settings panel.
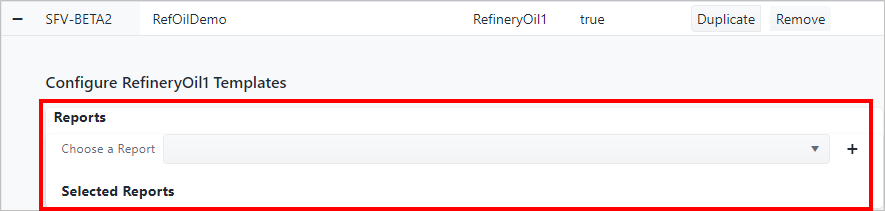
Create or Edit Display Settings panel - Reports
Expand the display setting that you want to assign the report to (as shown in above figure).
Click the Choose a Report down-arrow to display the list of available reports (as shown in below figure)
Reports - list
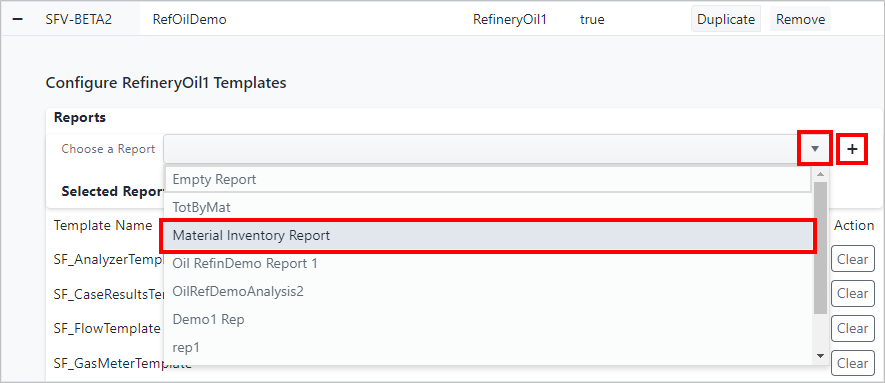
Click on the Report you want (as shown in above figure)
Click the
 Add button.
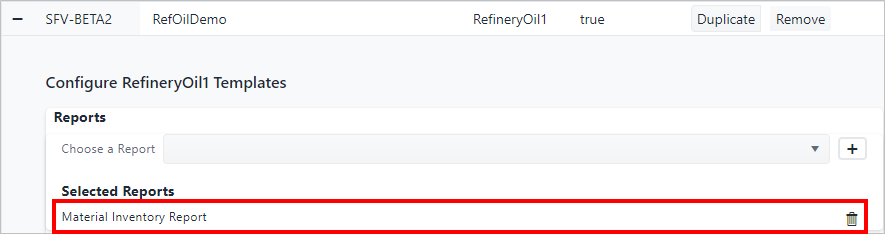
The Report displays in the Selected Reports area of the Report panel.
Reports - Selected Reports area displays added report
Unassign a Report
When you no longer want a report to be available to all displays that use a specific Display Setting in SFHub Visualizer, you can unassign (remove) the report at the Display Settings level.
To unassign a report from a Display Setting:
Open the Create or Edit Display Settings panel.
Expand the SFServer display setting that contains the report you want to unassign (remove).
Create or Edit Display Settings panel - Reports
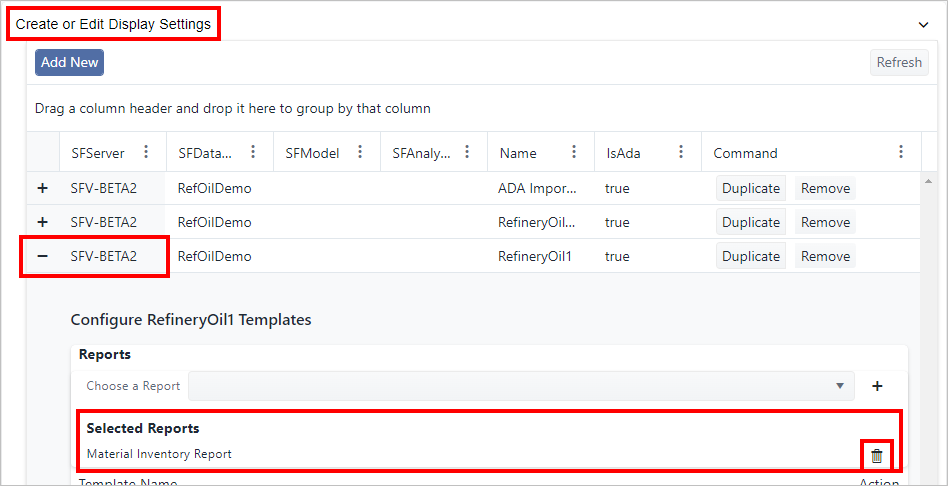
Under the Selected Reports area, locate the Report you want to unassign.
Click the
 Remove button (as shown in above figure)
The Report is removed from the Selected Reports area of the Report panel.
Reports - Report removed from the Selected Reports area