Share with Individuals
To share your project with one or more SigmafineHub users, you use the 'share' feature. This feature allows you to select each person you want to share with, and assign individual access permissions (read, write, execute, delete and share). Choosing to share on an individual basis gives you the greatest control over what someone else can do with your project and its content (individual analytics, reports and workflows).
To share your project with one or more SigmafineHub users:
Open your Studio Projects dashboard, if you have not done so already.
To open, click
 Home in the command bar.
Studio Projects
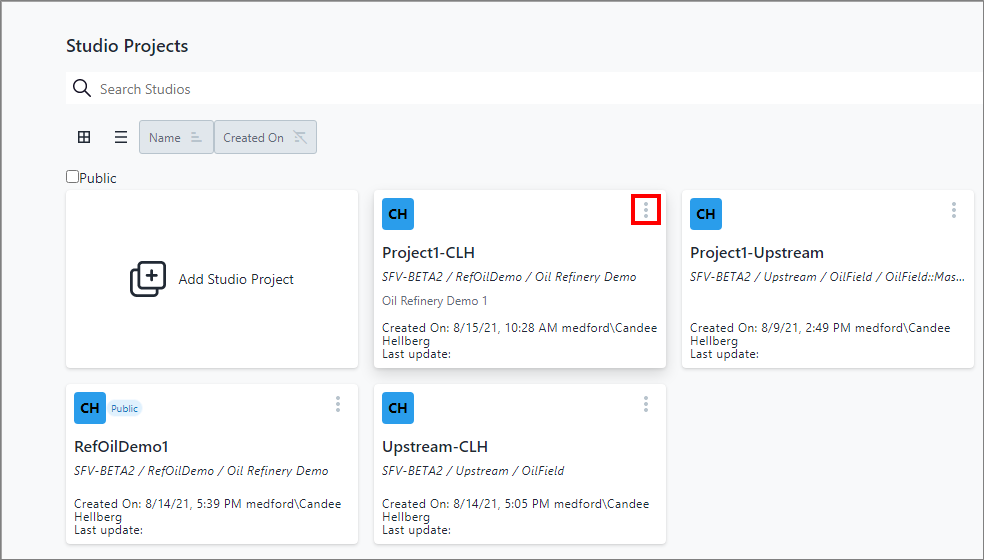
Click the
 vertical ellipsis in the top-right corner of the project block
(as shown in Figure 1) to display the Project quick menu (as shown
in Figure 2).
vertical ellipsis in the top-right corner of the project block
(as shown in Figure 1) to display the Project quick menu (as shown
in Figure 2).Project quick menu - select Share
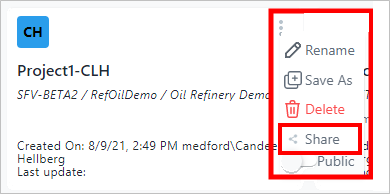
Click Share on the quick menu.
A Share panel opens to the Share tab.
Share panel - Share tab - select user
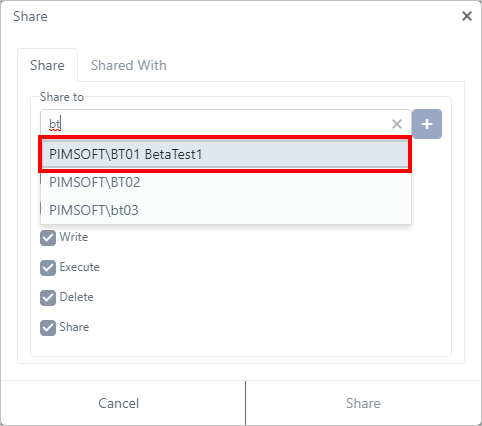
The Share tab is where you find and add the users you want to share the project with. As you begin typing the name of a user, all users with that character (or those characters) appear in a list.
In the Share to box, begin typing the name of a user you want to share with (as shown in Figure 3).
As you type characters, the names of a users with those characters appear in a list.
Choose the name of the person you want.
Click the
 Add button.
The name appears directly below the Share to box.
Share panel - Share tab - selected username displayed

At this point you can do one of two things; assign this person access permissions on this tab, or continue to add more people's names and then assign their permissions on the 'Shared With' tab, after saving their names to the shared list. If this is the only person you want to share your project with, then you can choose to assign their permissions now. If however, you want to share the project with additional people, you may want to add them all first and then assign permissions to each on the 'Share With' tab.
Assign permissions for a person on the Share tab:
a. Uncheck the Full access checkbox.
Assign project access rights on the Share tab
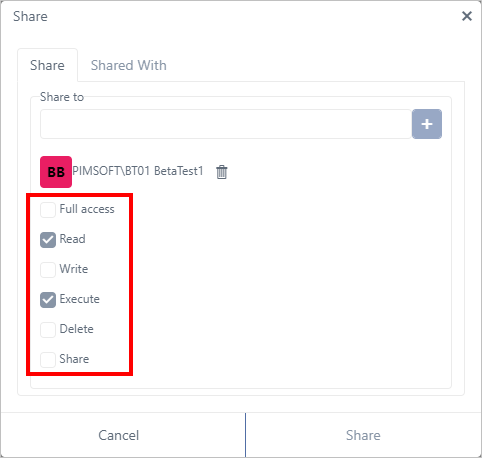
b. Check each box next to the permission you want to assign. (See Access Permissions for descriptions of the assignable permissions.)
c. Click Share.
The user and their permissions are added to the project. To view their permissions, reopen the project's "Share" panel and click on the Shared With tab; the person's name displays, along with the permissions you assigned them. Note that you can change their permissions here and save them.
Assign permissions to multiple people on the Shared With tab:
a. Repeat steps 4 - 6 for each person you want to share the project with.
Several selected individuals to add to the project
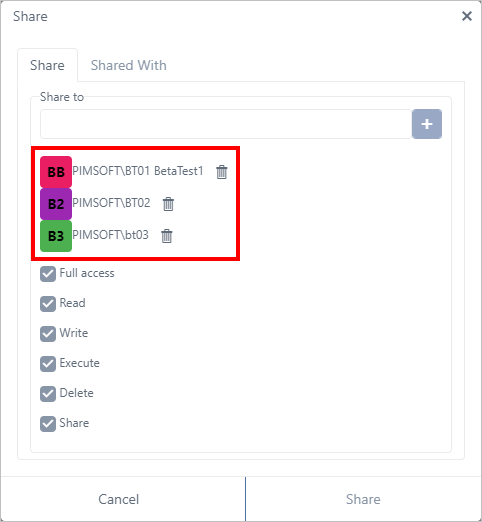
b. When finished adding people, click Share.
Every person you have selected is automatically assigned the default permissions (Full access) and their accounts are added to the project. The Share window closes.
c. Click the ![]() vertical ellipsis again, in the top-right corner of the
project block to display the quick menu.
vertical ellipsis again, in the top-right corner of the
project block to display the quick menu.
d. Click Share on the quick menu, to open the Share window.
e. Click the Share With tab to open the Share With panel.
Share With panel showing all people with access to the project
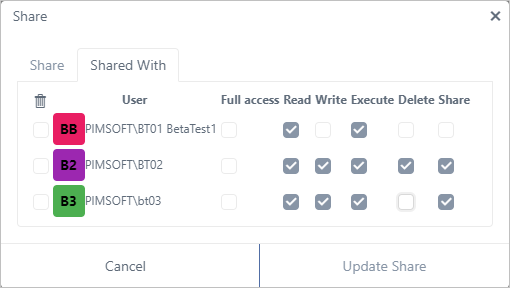
The Share With panel displays the names of all the people who currently have access permissions to the project, and what their individual permissions are. The people you just added show ALL permissions, because you added them with the default (Full access). In this panel, you modify their permissions as you wish, on a person-per-person basis.
To assign Full Access to a person, do not check the Full Access checkbox; instead, check the checkbox under each permission (Read, Write, Delete and Share).
f. For each person; uncheck the permission(s) you do not want them to have for this project, and make sure the permissions you do want them to have, are checked. (See Access Permissions for descriptions of the assignable permissions.)
g. Click Update Share to save your changes.