Create a New Project
Before you can work with a project, you must create the project container by specifying the "Sigmafine context", where you want it built. "Sigmafine context" simply refers to the level at which you want the project built; Database, Model or Analysis. When choosing the level, you must always choose the preceding level meaning that if you want your project to be built:
At the Sigmafine database level - you need to choose both a Sigmafine server and database
At the Sigmafine model level - you need to choose a Sigmafine server, database and model
At the Sigmafine analysis level - you need to choose a Sigmafine server, database, model and analysis
To create a new project:
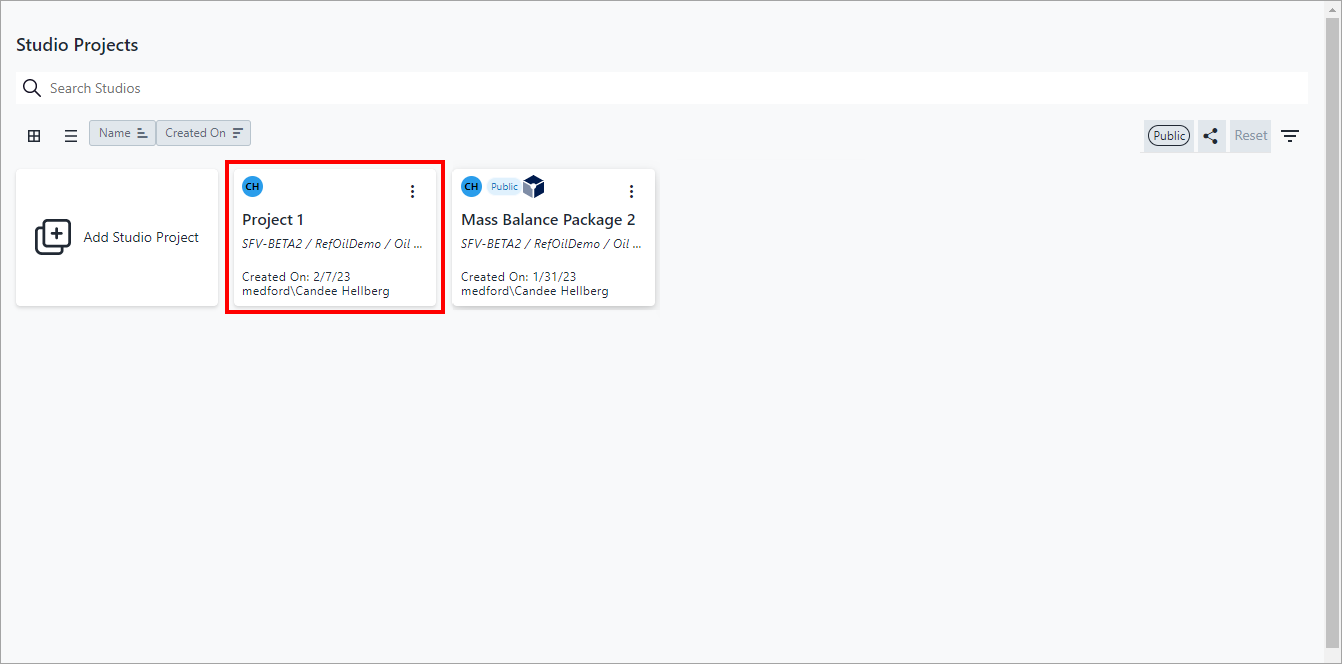
Open your Studio Projects dashboard, if you have not done so already.
To open, click
 Home in the command bar.
Studio Projects
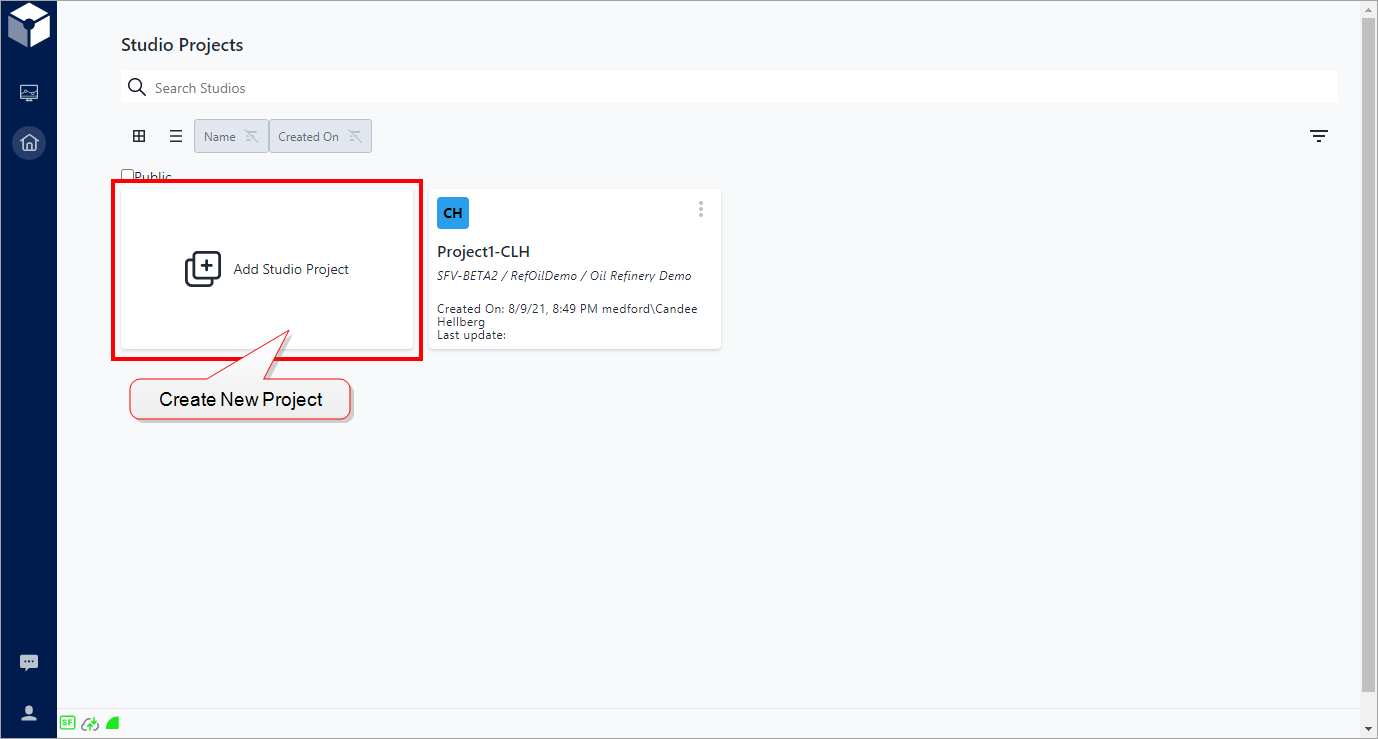
Click the Add Studio Project block.
A Create panel opens displaying a list of available SFServers to choose from.
StudioNew Studio Project panel - select SFServer
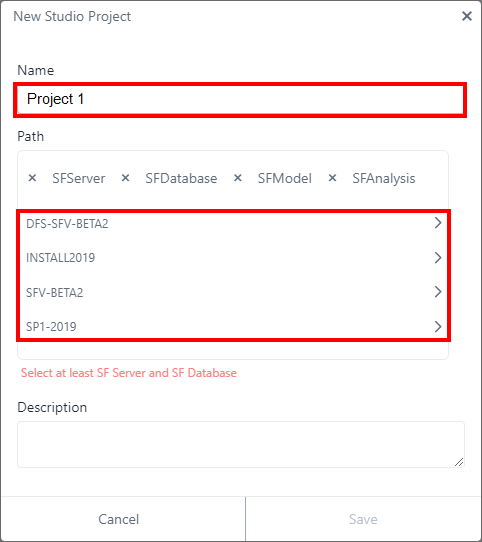
Type a Name for your project.
Click on the SFServer you want to select.
The panel updates to display all available SF Databases of the selected SFServer.
New Studio Project panel - select an SFDatabase

Click on the SFDatabase you want to choose.
The panel updates to display all available SFModels of the selected SFDatabase.
Create panel - select an SFModel

Click on the SFModel you want to choose.
The panel updates to display all available SFAnalysis items of the selected SFModel.
Create panel - select SFAnalysis
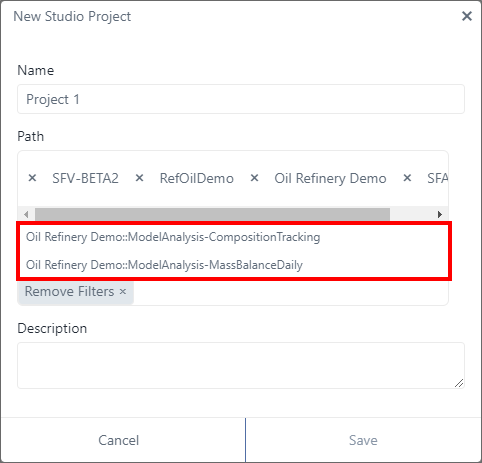
(Optional) Click on the SFAnalysis you want to choose.
The panel refreshes once again to show your selections.
Create panel - add description, determine public access and save

Type a short Description for your project.
(Optional) Check Public visible to everyone, if you want to allow everyone to have access to this project.
As you create the project, you are automatically set as its "owner". As the owner, you can determine whether or not to make the project "public", meaning that everyone is able to see your project on their Studio Projects dashboards. You can also share parts or all of the project with specific individuals, but only after the project has been saved. When you share a project, you can also determine what the person is allowed to do within the project by assigning specific rights (view, read, write, delete, etc.). For more information about public access and sharing rights, see Access Control.
Click Save.
Your project is saved and now visible on your Studio Projects dashboard.