Save Records to Transfer Set Template
TES allows you to save Transfer records to Transfer Set Templates for subsequent imports into TES. These Transfer Set Templates are actually AF tables you create in the database, and to which you save the information from sets of transfers, so that information is readily available for routinely created transfers. The transfers can then be easily modified, updated and created again in TES.
To save Transfer records to a Transfer Set Template:
Open System Explorer.
From the Navigation pane, select Library, as shown in the following figure.

In the Tree view, right-click on Tables and select New Table.
In the table name box, type a table name starting with
SF.TES..The "SF.TES." prefix is required in order for TES to recognize the table.
EXAMPLE: TES Table
SF.TES.Template1Do not change or configure the table, just create it.
Run the TES application.
In TES, open the log to the records you want saved to the table.
Select the table to which you want to publish the transfer (the table you just created in System Explorer), as shown in the following figure.

Click the Save Records button.
The records visible in the Pumper Log are saved to the table you have selected.
Should you select a table you had created previously and it currently contains information, the following warning message displays.

The message informs you that the information that is currently in the selected table will be overwritten with the information visible in the Pumper Log. The only exception is if the Pumper Log contains the same exact information as the target table.
Click Yes to write the information from the Pumper Log into the table.
(Optional) To ensure that the process completed successfully:
In System Explorer, select Library from the Navigation pane.
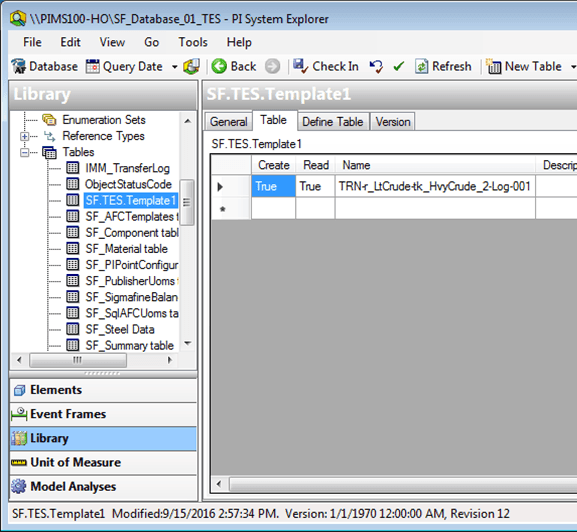
Expand the Table tree.
Click on the TES table to which you saved the Transfer records from the Pumper Log.
The table is displayed, as shown in Figure 1795.
Click the Table tab to view the Transfer records that were saved to the table.