Create a Simple Report
The following steps are the minimum required to create a report.
Create the Report.
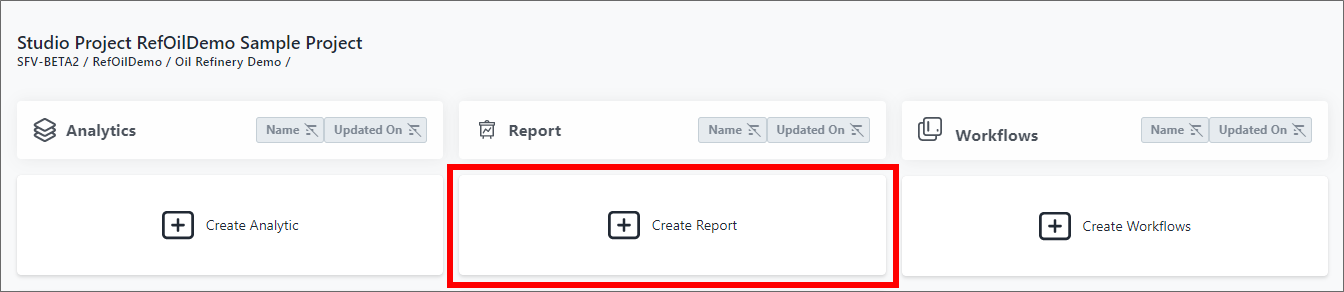
a. From the Studio Projects dashboard, click on the project you want to create a report for.
b. Click Create Reporton that project's Studio Project dashboard.
Studio Project [project name] example
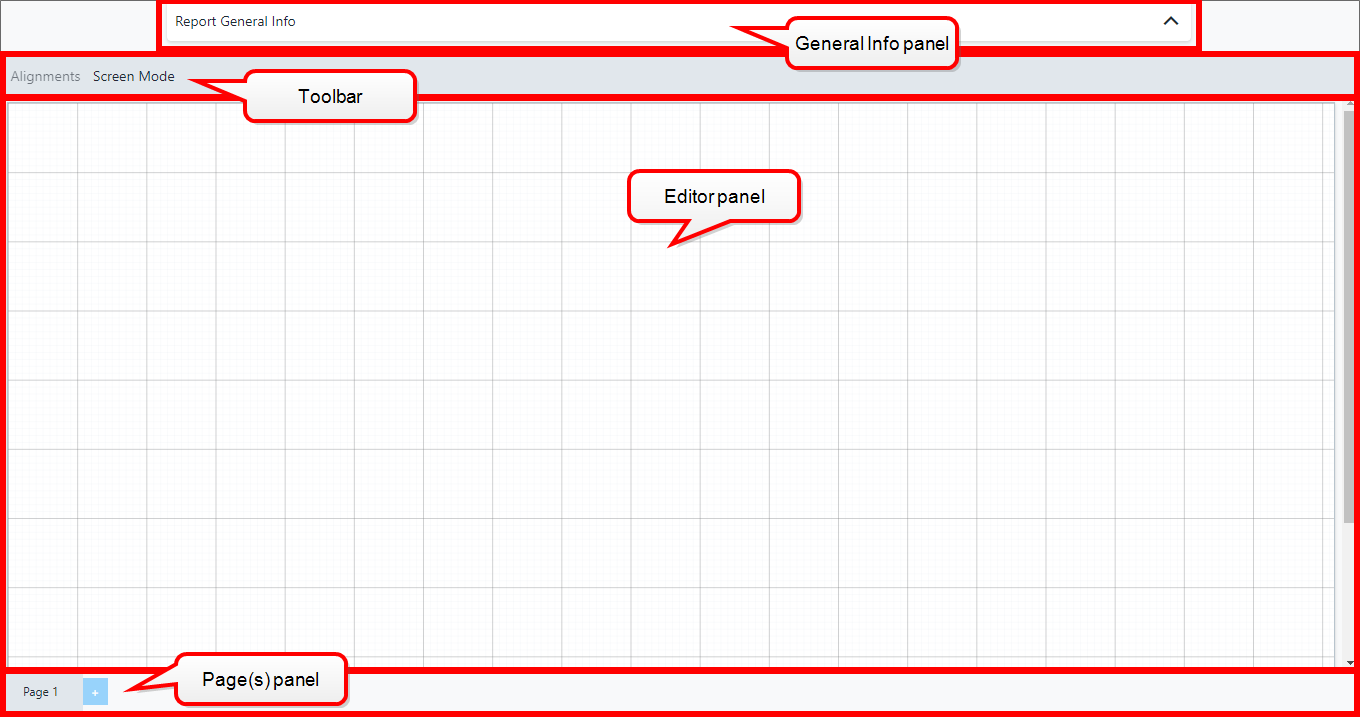
An empty report is displayed in SFHub Report Editor..
Empty Report Panel
Assign a Name to the Report.
a. Click on Report General Info to open the panel.
b. Click the General tab to open its panel, if not already open.
Report General Info - General tab - Name

c. Type a Name for the report.
Choose the Report Type.
a. Click the Type tab to open its panel.
Report General Info - Type tab - Level

b. Click in the Level box and choose the type of report from the list. For this simple report, we are going to choose 'Case'.
Insert a Table visual object.
a. Double-click on the Report Design area to open the Visual Object toolbox.
Visual Object toolbox - Select Table

b. Click the Table icon, as shown in Figure 461. The Table displays on the design area.
Table Visual Object

You can choose the visual and drag it anywhere in the design area.
You can also resize the visual by dragging on its bottom right-hand corner.Configure the Data Source.
a. Click the Edit icon of the visual object.
Visual Object - Edit Icon
 The visual object's configuration panel opens.
Table visual object configuration panel
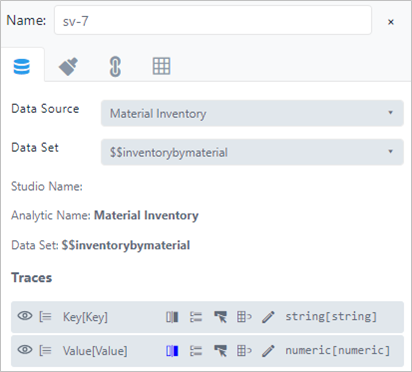
b. Click the Data Source tab, if not already displayed.
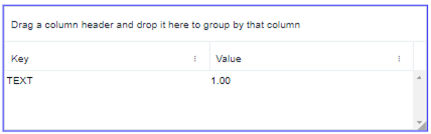
c. Click the Data Source box and choose the data source you want from the list. We choose 'Material Inventory' for our example. The Table visual object displays a preview of the columns returned by the selected Data Source (in our example you can see two columns because the selected Data Source is of type SFHub Dictionary).
Table visual object displaying columns preview
Save the Report.
a. Click the Save button on the right side of the Status bar.
Configure your Report in SFHub Visualizer Settings.
a. Open the SFHub Visualizer application.
b. Open your personal Settings panel.
Your Personal Setting

c. Click Create or Edit Display Settings to open its panel.
d. Open your Display Setting.
Opened Display Settings
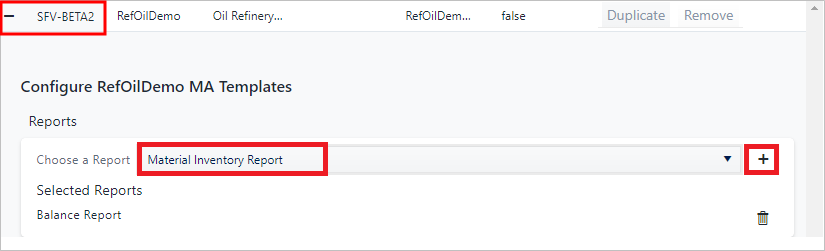
e. Click the Choose a Report box and choose Material Inventory Report from the list.
f. Click
 (Add) to add your report.
Choose an assigned display setting in the same context (Server, Database, Model) of your SFHub Studio project.
Open the Report in SFHub Visualizer.
a. Open your SFHub Visualizer Display. i. Click the
 SFHub Visualizer icon.
ii. Click the
SFHub Visualizer icon.
ii. Click the
 Display icon and choose a Display.
b. Click the
 Case Search icon and choose a Case.
c. Click the Report icon on the command bar and choose 'Material Inventory Report' (the report you created and saved).
Report Icon - Choose Report

The Report is actualized by the selected Case data.
Actualized Report
