Configure the Interface
The SFHub Studio Analytic (MaterialInventory) used by the report, exposes an interface variable (\$\$TankAttributes) that can be used to customize (include additional attributes) to the data table (\$\$TankTable). The following steps describe how to configure the interface for this.
Open the Report.
a. Go to or reopen SFHub Studio.
b. Select the Project that contains your report.
c. Click the Report block in the Studio Project [project name] dashboard, to open the report in the design area.
We opened the new report we created; Material Inventory Report.Open the Interface Editor.
a. Click on Report General Info to open the panel, then click the Interface tab.
Report General Info - Interface panel

b. Click on the new Value column of the \$\$TankAttributes interface variable.
New 'Value' column

The Interface Editor opens.
Interface Editor

c. Click the Search box (as shown in Figure 520).
The Help panel opens.
Interface Help panel
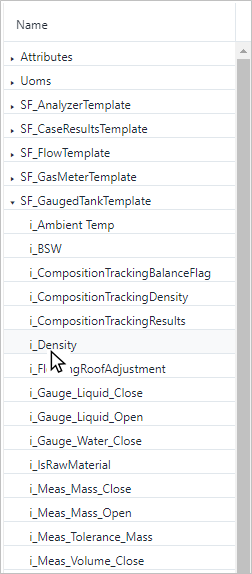
d. Navigate to choose a new attribute (
i_Densityin this example).
The selected attribute (i_Density) is added to the Interface variable.
New attribute added to Interface variable

e. Click Save in the configuration panel, to save the updated interface.
f. Click the Save button in the Report General Info panel.
Save button in Report General Info panel

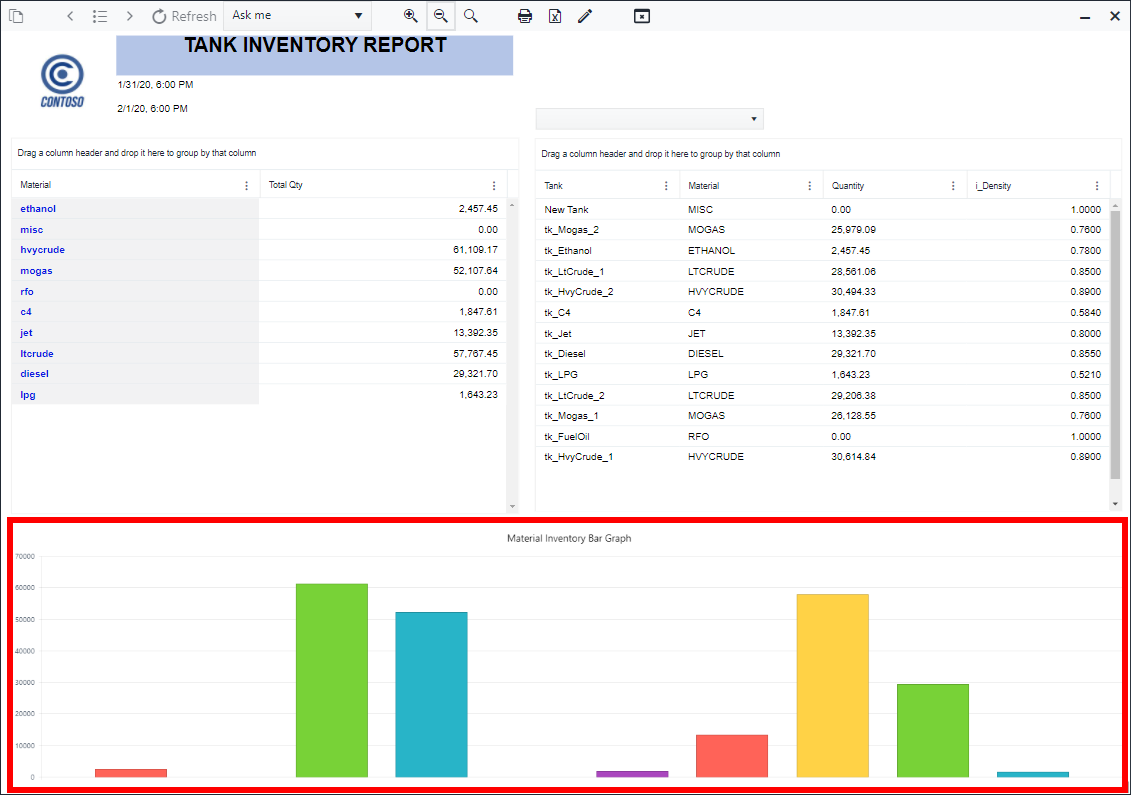
The new column displays in the Table visual.

g. Click Save on the right side of the Status bar to save the Report.
h. Run the report in SFHub Visualizer.
i. Reopen SFHub Visualizer, if not still open in another browser instance.
ii. Click the
 Report icon in the command bar and choose the report you
created.
Report icon in the command bar and choose the report you
created.
We chose the 'Material Inventory Report' that we created.
Choose tk_ltCrude_2 in the Model panel