Configure OLEDB Data Server
To configure the OLEDB Data Server:
Run the Integration Framework - Configurator application.
The Integration Framework - Configurator window opens.

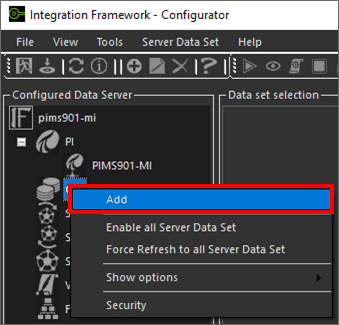
In the Configured Data Server pane, click on OLE.
In the toolbar, click the
 Add icon.
Alternatively, you can right-click on OLE and select the Add option as shown in the following figure.
The Configure OLE window opens.
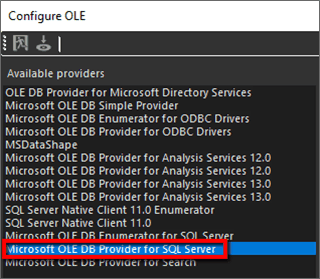
Under Available providers, select Microsoft OLE DB Provider for SQL Server.
The panel expands to display an OLE Server selection option.
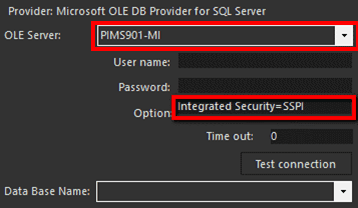
Click on the OLE Server down-arrow an select the OLE Server instance.
In the Option box, type
Integrated Security=SSPI.If you would like to use the SQL Server authentication, type in the related User name and Password in the appropriate boxes.
Click the Test connection button to test the connection.
A Server connected message display, as shown in the following figure.

Once the connection test is terminated successfully, the Data base name box provides a list of the databases configured on the Selected SQL Server instance.
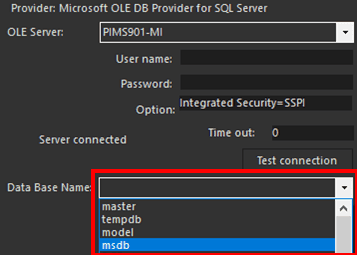
Click on the Data Base Name down-arrow and select the database to connect to.
Click the
 Save and Exit icon.
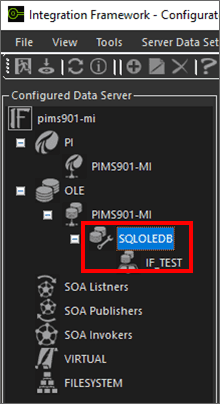
You are returned to the Integration Framework - Configurator window where the server and database you selected now display under OLE, in the Configured Data Server pane, as shown in the following figure.