Tank Attribute Table
The tank Attribute Table feature displays a table with a summary of Attribute settings for the selected tank.
To open the Attribute Table:
To open the Display Tank Detail window:
Open the Tank dockable window.
From the IMM Toolbar, click on the
 Tank button to open the Tank dockable window.
Select the tank for which you want to view the Attribute table.
Do one of the following:
From the IMM Toolbar, click on the
 Attribute Table button.
OR
Right-click on the tank for which you want to view the Attribute table, and select Tank Action > Attribute Table.
The Attribute Table for the selected tank displays.
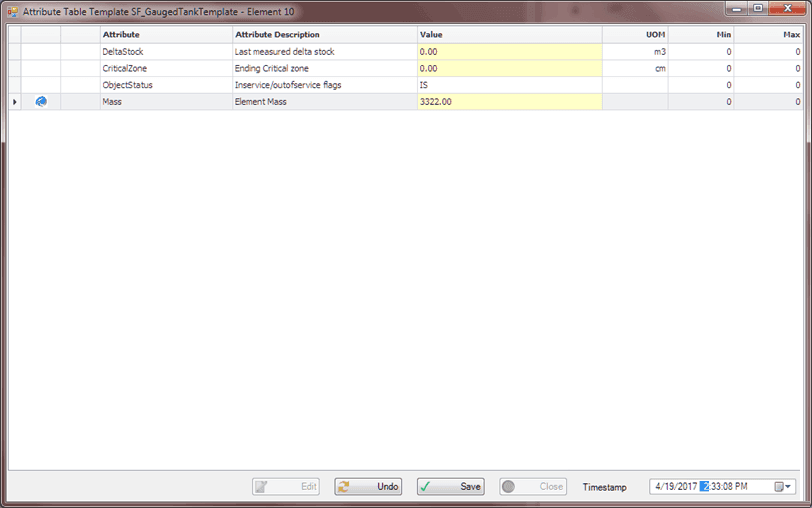
The table’s rows are customizable (using IMM_AttrTableDatailConfig). However, the nine (9) columns are fixed and defined as follows:
Column 1: The
 symbol marks the selected row
Column 2: The symbol can change depending on the source of the data:
This symbol marks the values coming from PI Tags This symbol marks the values calculated by table look-up This symbol marks the values calculated using a formula This symbol marks the values calculated by Sigmafine Column 3: The
 symbol marks the values that are under limits constriction
Column 4: Attribute - name of the Attribute shown
Column 5: Attribute Description - description of the Attribute shown
Column 6: Value - the value of the attribute
Column 7: UOM - attribute’s unit of measure
Column 8: Min - minimum limit
Column 9: Max - maximum limit
(Optional) To allow editing of those cells that are editable (yellow highlighted cells in Figure 1628), click the Edit button.
The editable values are customizable by using the parameters in the configuration file, 'IMM_AttrTableDatailConfig'.
(Optional) To change the time-stamp of the 'PiTag' value:
Select the cell with the PiTag.
Click on the Timestamp box in the bottom right corner of the display, and type the time-stamp you want in
mm/dd/yyyy 00:00:00 AM(orPM) format.OR
Click the Calendar button next to the box, to select the date and time from a calendar window.
If you made changes, click the Save button to save those changes.
If you do not want to save any changes, click the Cancel button.