Creating an Analysis
To create an analysis:
Open Modeler.
On the Analysis Toolbar, click the New Analysis icon.
 :
:The Choose Analysis Template window.

In the Choose Analysis Template window, \<None> is selected by default. This value is fine for what you need to do.
Click OK.
The Analysis Properties window opens.
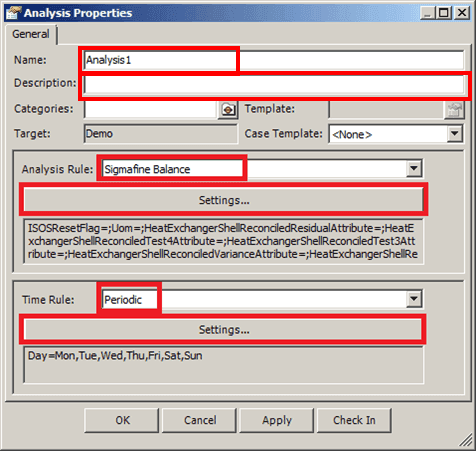
In the Name box, type a name for the new analysis.
(Optional) In the Description box, type a short description for the analysis.
Click the Analysis Rule down-arrow and select the analysis rule to use.
In our example, we are using the Sigmafine Balance Analysis Rule.
Click the Settings button under the Analysis Rules box, to configure the analysis rule.
Click the Time Rule down-arrow and select the time rule used for scheduling this analysis.
Click the Settings button under the Time Rules box, to configure the time rule.
For details on configuring the analysis rule, see the "Analysis Rules User Manual" and refer to the section for the type of analysis rule you are configuring. You can also get the same details from the "Server and Client Online Help" under "Analysis Rules", where you can find the topics relative to the type of analysis rule you are configuring.
Click OK to save your analysis and close the Analysis Properties window.
Your new analysis appears in the AF Analysis toolbar, as shown in the following figure.
