Adding New Rows
The following sections provide the process of adding new rows to the Sigmafine Quality Tracking Viewer main window. This tool is very useful when setting up the initial case.
Adding Rows
To add rows to the Quality Tracking Viewer:
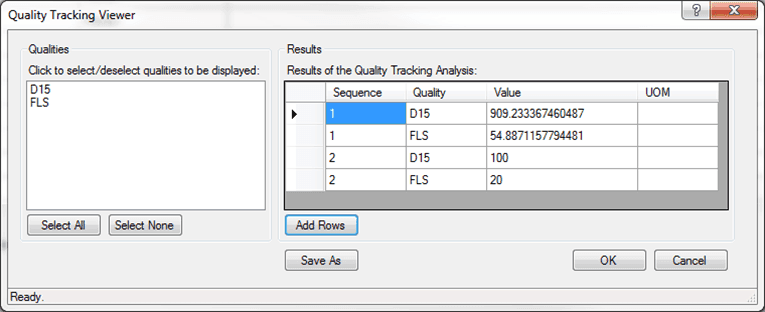
Click on the Add Rows button, as shown in the following figure.
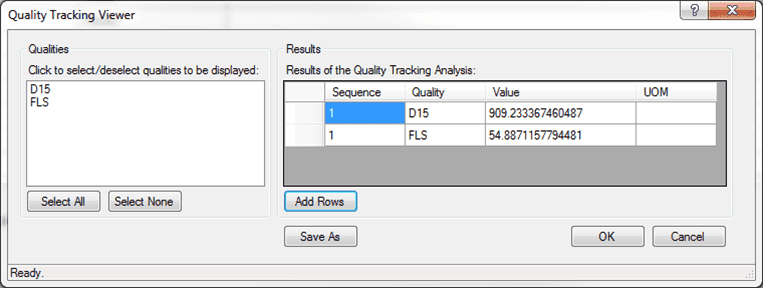
The Quality Tracking Viewer - Add Rows window opens. This dialog will look very similar to the main dialog, with the exception that the “Results Table” is empty until you add new rows.
This window looks very similar to the main one, as the Qualities list is populated with the same qualities. The only exception is that the Results table is empty.
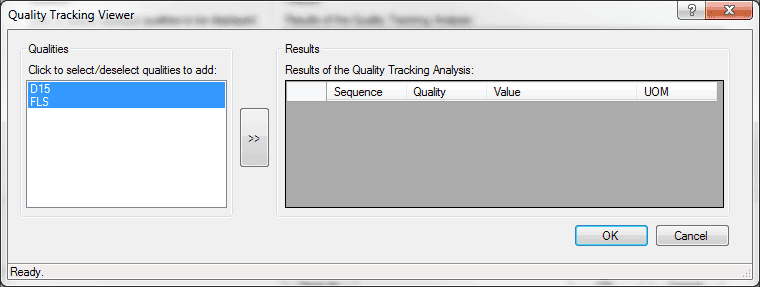
From the Qualities list, select the qualities for which you want to create new rows (as shown in Figure 1374).
In our example, we are adding one new row for the D15 quality and one new row for the FLS quality.
Click on the >> (add) button.
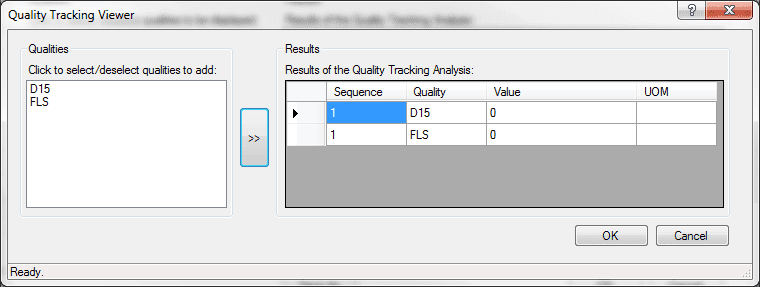
In the Results table, one new row is added for the each quality you have selected (as shown in Figure 1375).
In order to create multiple new rows for a quality, you need to select the quality again and click the >> (add) button until you have the desired number of rows. Every time a new row is created, it gives the row a default 'Sequence' of 1 and a default 'Value' of 0.
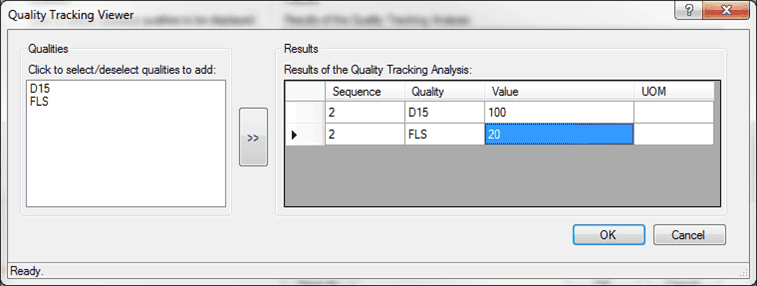
For each row, edit the value in any column of data.
 EXAMPLE: Editing values for Sequence and Value rows
We have edited the 'Sequence' and 'Value' columns so that once the new rows are added back into the main window, we can easily see which rows are the ones we added.
When finished, click OK to add the newly created and edited rows back to the main window.
All the rows are sorted in alphabetically order by sequence and added to the Results table in the main window.
Note: Keep in mind that if any filters are applied, you might not see the newly created rows until you remove the filters.
EXAMPLE: Edited rows added to Result table in main windowIn the following figure, you can see how the edited rows from our previous example have been added to the Results table in the main window.
Click OK in the main window, to save the newly added rows to AF.