Users (Management) Tab
The Users tab allows administrators to manage user accounts for SQL Access. This tab displays a toolbar with icons representing different types of controls. Under the toolbar is a list containing all the users who have accounts setup.
The toolbar controls are described in the following table:
Users Toolbar Controls
| Control Icon | Control Name | Control Description |
|---|---|---|
| Add User Profile | Opens the "User Profile" window where an administrator can set up a new user profile (account). | |
| Remove User Profile | Removes the selected user's profile (account). | |
| Disable User Profile | Disables the selected user's profile (account). | |
| Enable User Profile | Enables the selected user's profile (account) if their profile is currently disabled. | |
| Modify User Profile | Opens the "User Profile" window for the selected user so that an administrator can modify the details of the user's profile (account). | |
| Refresh | Refreshes the list of user profiles. |
User Profile
To create a new SQL Access user profile (user account):
From the primary menu, select Admin to open the administration pane.
Click on the Users tab to open the User Profile window.
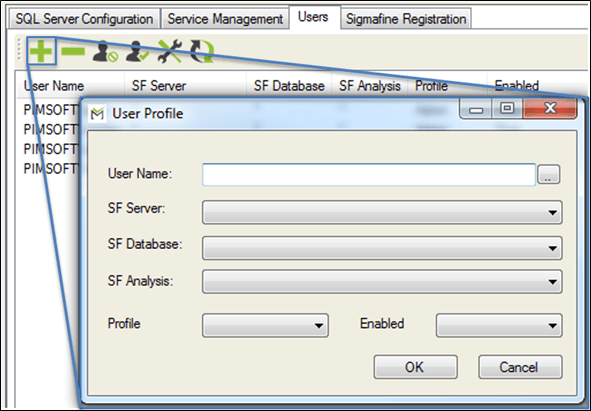
In the User Name box, type the name the user will use to log into Sigmafine SQL Access.
Alternatively, you can select the user's user name from a list of current domain users, by clicking the
 ellipsis button.
Click on the SF Server down-arrow and select the server to which the user needs access.
If the user needs to have access to all the SF servers, select the “
*” asterisk option.Click on the SF Database down-arrow and select the database on the selected server to which the user needs access.
If the user needs to have access to all the SF databases on the selected server, select the “
*” asterisk option.Click on the SF Analysis down-arrow and select the analysis to which the user needs access, in the selected database.
If the user needs to have access to all analyses in the selected database, select the “
*” asterisk option.Click on the Profile down-arrow and select the permissions profile (Administrator, Configurator or Publisher) to apply to this user's profile.
Click on the Enabled down-arrow and select whether or not the permissions Profile you assigned in step 7 is usable for this user's profile.
Click OK to save the new user profile and close the User Profile window.
Using Quick Action Keys
In the User Profile window, you can use the following keyboard and mouse functions to perform certain actions.
- Enter: If you press the enter key on your keyboard while a user profile is selected, the "Modify User Profile" window opens for that user.
- Delete: If you press the delete key while a user is selected, the "Remove User" prompt is opened for you to confirm the deletion of the selected user.
- Double-Click: If you double click the left mouse button, it performs the same action as the Enter key on your keyboard.