Defining the Appearance of the Element
You can choose a symbol to represent instances of an Element template in a display.
To associate a ProcessBook symbol with an Element template:
Create an Element using the Template.
Add that Element to the Model display.
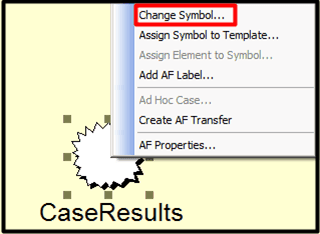
Right-click on the Element and select Change Symbol, as shown in Figure 821.

Ensure that the Toolbox option is selected, if you want to make a variety of symbols from which to choose.
Click OK to save your selection and close the Change Symbol window.
You are returned to the Model display.
Double-click on the Element in the Model display to open the Symbol Library window.
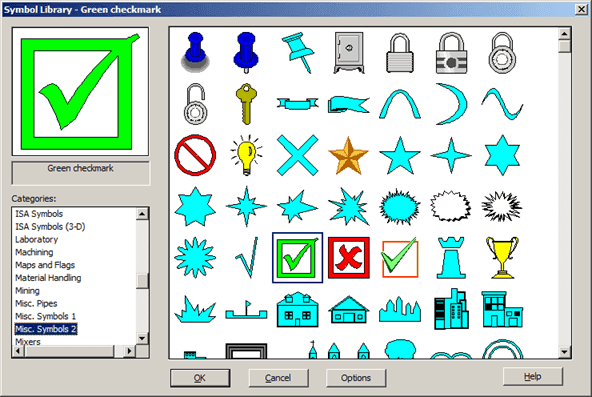
Browse through the various categories and select the symbol you want to use for the element.
There are also options available to further customize the symbol if you want.
Click OK to save your selection and close the Symbol Library window.
The Element now appears in the Model as the symbol you have selected.
In our example, we selected the green check, so the Element appears as that green check in the Model display, as shown in the following figure.

Right-click on the symbol and select Assign Symbol to Template
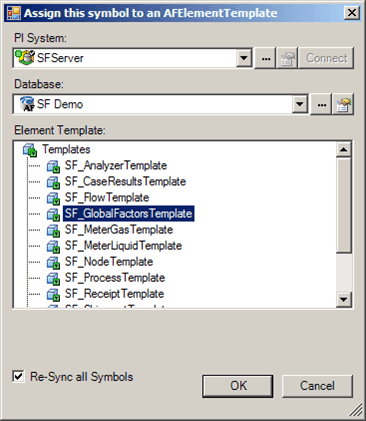
Select the template to which you want to assign the element.
(Optional) Select the Re-Sync All Symbols if you want any existing elements based on the template already in the display, to be updated to reflect the new symbol.
Click OK to save your selection and close the Assign this symbol to an AF Element Template window.
All new elements created from this template will have this symbol associated with them.