Create a Workflow
The creation of a new workflow requires you to first select the SFHub Studio Project from which you want to pick the SFHub Studio Analytics to include in the new workflow. Once a project is chosen, you can continue with the configuration of the workflow.
Currently, you cannot create workflows that include analytics configured in different SFHub Studio projects.
To create a workflow:
Click the
 Settingsicon in the command bar, to open the Settings page.
Settings page

Click on Workflows to open the Workflows panel.
Workflows panel

Click in the Choose a Project box, and select the project you want to add a workflow to.
Choose the Project

Click the
 Add button.
A Create Work Flow panel opens.
Create Work Flow panel

Click in the Name box and type a name for the workflow.
This is the name that appears in the 'Choose Workflow' drop-down list in the SFHub Visualizer Workflow panel.
(Optional) Click in the Description box and type in a short description that represents the purpose of the workflow.
Click the Select Workflow box and choose the workflow step.
Select Workflow list
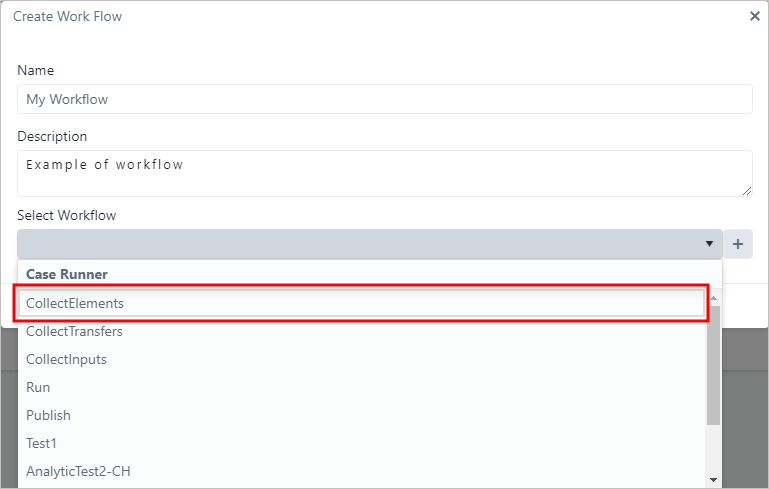
The list shows the standard Case Runner steps and all the SFHub
Studio Analytics available in the selected SFHub Studio Project.
Click the
 Add button.
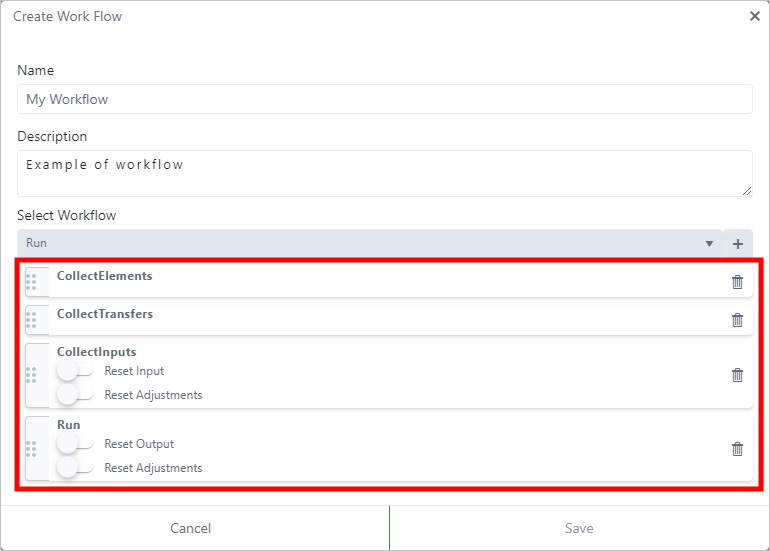
The workflow step is listed under the Select Workflow box, as shown in the following figure. Steps added to the list will be added to the workflow when you save it.
Workflow step added to list

You can add as many steps are you want to include in your workflow.
Repeat steps 7 & 8 for each workflow step you want to add.
As you add each step, it is added to the list.
Steps added to workflow step list
 info
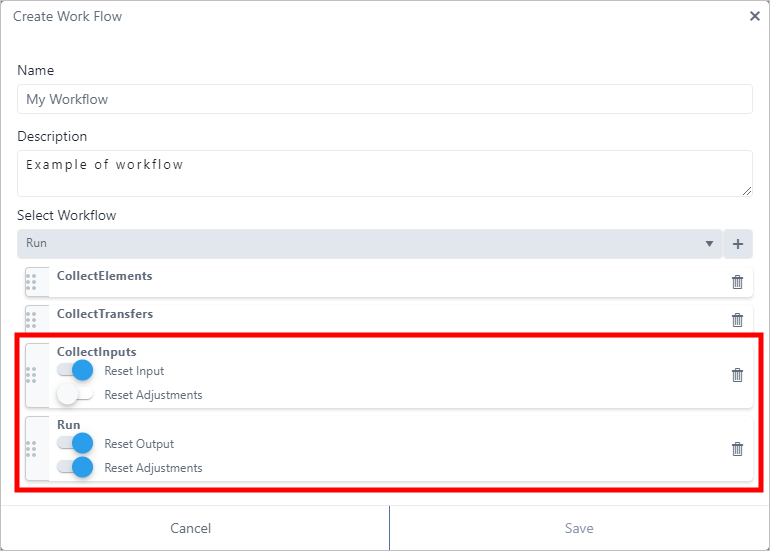
infoThe Collect Inputs and Run standard steps also allow you to configure the standard behavior you would like applied, before the execution, as shown in above figure.
To configure the standard behavior of a Collect Inputs or Run standard step:
To enable a setting, click its
 white dot; the dot slides to the right and turns blue
 ,
indicating that the setting has been enabled.
,
indicating that the setting has been enabled.To disable a setting, click its
blue
dot; the dot slides to the left and turns white
,
indicating that the setting has been disabled.
Example: Enabled and disabled setting
Example of enabled and disabled settings for Collect Inputs and Run steps
(Optional) To remove a step from the list, click on its trash can icon.
If finished added steps, click Save to save the new workflow.
The workflow is now visible and usable from SFHub Visualizer, where the SFHub Studio Analytics are available to be used to generate the information required to support your reconciliation process (as shown in the following figure).
Workflow Panel in SFHub Visualizer showing the Workflow
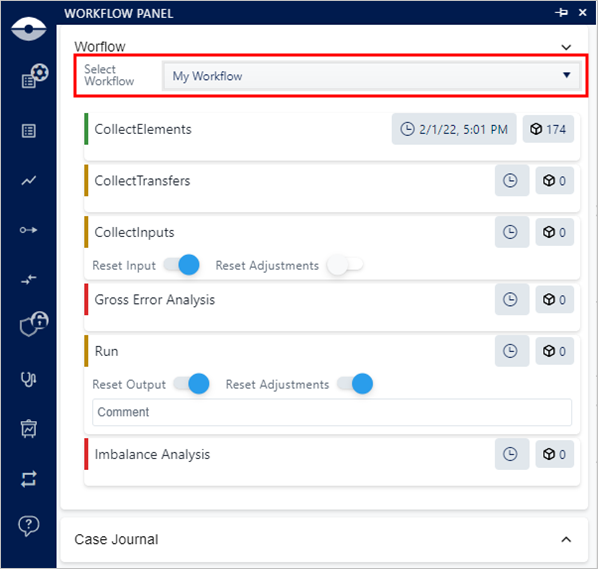
The created workflow is available on the SFHub Visualizer Display or Reports that refer to the same Sigmafine Context where the workflow has been created (the Sigmafine context that is connected to the SFHub Studio Project you selected).
The SFHub Studio Analytics included in the workflow should be the ones designed to generate contents that are actionable insights, digital actions or that perform actions (see Analytic Usage in this document). The inclusion of SFHub Studio Analytics designed as an ETL for Reports, doesn't generate any usable information in this usability context, as it only feeds the Reports.