Step 3: Install
Run the install kit; it will upgrade SigmafineHub.
Log on to the application server, using a domain user account that belongs to the local Administrators group.
Copy the SFHub.exe file on the file system.
Run the SFHub.exe to launch the installation wizard.
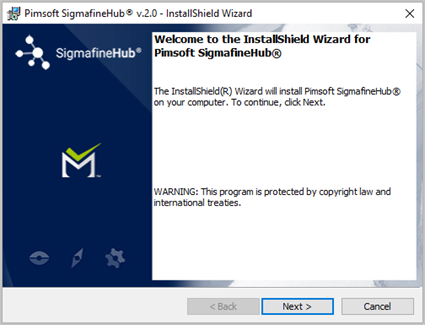
The Welcome page opens.
Welcome page
Follow the installation steps found under Step 2: Installation in the "SigmafineHub Installation" chapter of this guide.
Click Next to open the License Agreement page.
License Agreement page
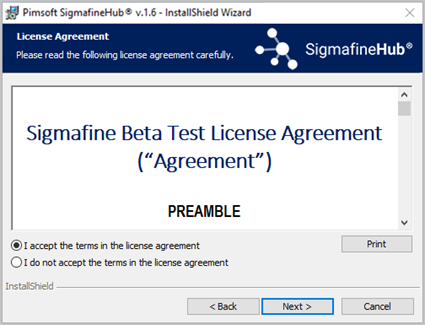
Select I accept the terms in the license agreement and click Next.
If you are upgrading to SFHub 3.x, following warning message is shown:
 Note
NoteAll the display converted by previous versions to SFHub 3.0, need to converted again using the new display converter.
Click Continue to open the (IIS) Application Pool Configuration page.
Application Pool Configuration page
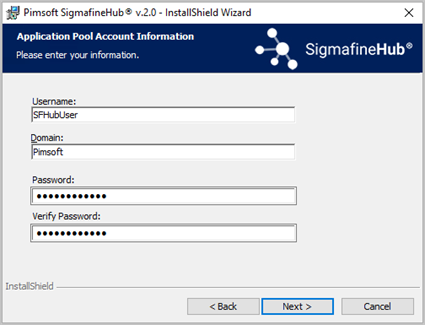
This page allows you to assign the identity entered to the SFHubAppPool.
We recommend using the same credentials as the SFHubService account.
In the Username box, type the name you are using for the service account (SFHubService).
In the Domain box, type the Azure Active Directory Domain name associated with the service account username.
In the Password box, type the password associated with the service account user name.
In the Verify Password box, retype the same password.
noteIf the selected user has an expiring password you receive a warning when you click on Next. You can either go back and use a different user account or continue, knowing that it may cause issues. Click No to go back and use a different account, or OK to continue.
Application Pool user has an expiring password message

Click Next to open the Tenant User Information page.
Tenant User Information page
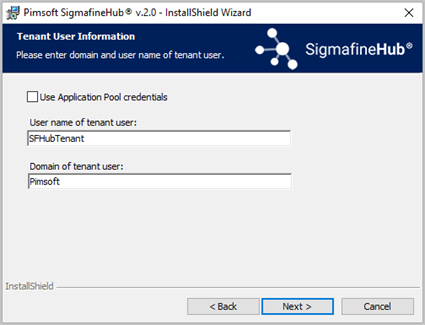
This page allow you to define which Domain User is to be the "Tenant" user. The Tenant user is the first user of the SigmafineHub application. This user has all the privileges needed to initially configure the application itself (add user and define their access rights).
Check the Use Application Pool credentials box, to auto-fill the tenant username and domain with the ones previously configured for the service account.
In the User name of tenant user box, type the actual log in name of the Tenant user.
In the Domain of tenant user box, type the name of the Domain of the Tenant user.
Click Next to open the Web Socket Port page.
Web Socket Port page
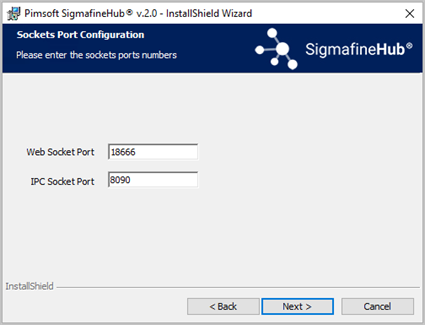
This page allows you to define the TCP port used by the Web Socket.
In the Web Socket Port box, type the number of a free TCP port that could be used by the SFHub application server (See "Step 1: Preparation, Open the Required Port").
noteThe selected TCP ports must be configured in the Firewall Inbound Rules of the Windows Server, to allow the inbound network traffic.
Click Next to open the Destination Folder page.
Installation Destination Folder page
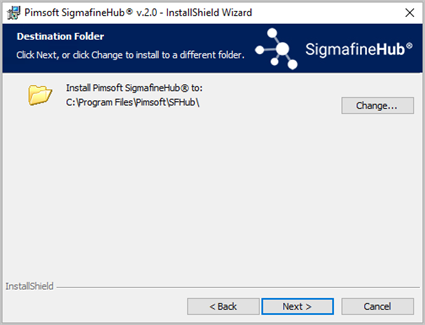
The Destination Folder is the folder in which the application files are to be installed.
Leave the default folder or click Change to select an alternate installation destination folder.
Click Next to open the SFHub Database Creation or Update page.
SFHub Database Creation or Update page
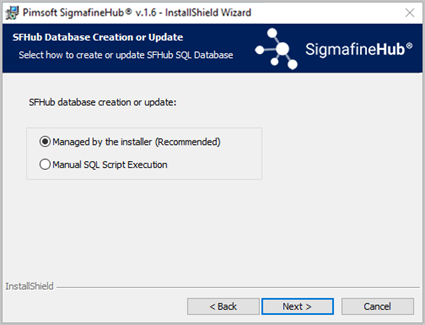
Select the mode to use to create or update the SFHub database.
Managed by the installer (Recommended): Connect to the SQL Server instance to create and configure the SFHub database.
Manual SQL Script Execution: Download the script, install it on the SQL Server instance and confirm the creation of the SFHub database. The installer can then check if the database created is consistent.
Click Next to open the corresponding database creation page.
Depending on which mode you selected in the previous step, different steps are required. Follow the steps for the mode you have selected.
Managed by the installer (Recommended)
In this mode, you are required to provide a valid SQL Server instance and the associated credentials to be used by the installer to create or update the SFHub SQL database. Ensure that the credentials you provide have the correct SQL grants for creating and altering SQL databases.
Database Server page
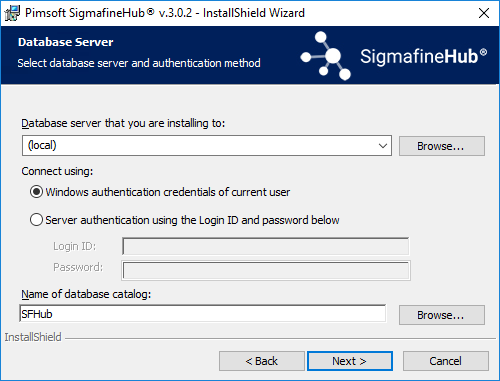
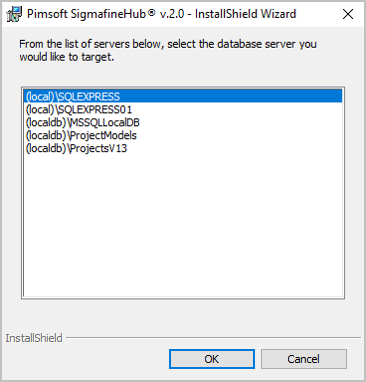
a. Click the Database server that you are installing to down-arrow and select the SQL Server instance where the SFHub database is to be created.
OR
Click the Browse button and select the SQL Server instance where the SFHub database is to be created. You can also just type the SQL Server instance name.
Browse - Server selections
b. Click on the Connect using method to use for connecting to the server.
Windows authentication credentials of current user: If you select this method, ensure that the Windows user name that is being used to run the setup (this installation), has the required admin rights on the selected SQL Server instance.
Server authentication using the Login ID and password below: If you select this method, the connection must have the Admin privileges over the selected SQL Server instance, in order to successfully complete the installation. Type the Login ID and Password to be used.
c. Take care to specify the name of the current database catalog to be updated if different from SFHub.
Manual SQL Script Execution
In this mode, you are required to download and execute the SQL Scripts to create or update the SFHub SQL database.
Manual Database Creation or Update page
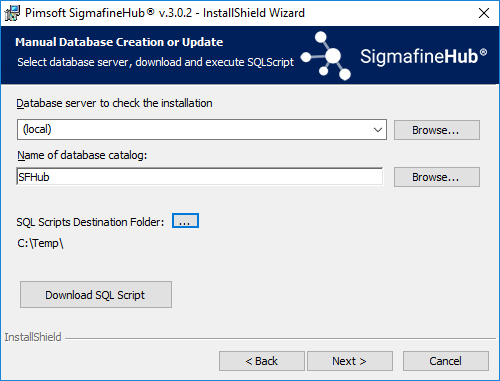
a. Click the 'Database server to check the installation' Browse button and select the SQL Server instance where the SFHub database is to be created or updated, or just type the SQL Server instance name in the box.
b. Specify the database catalog name to be upgrated by the SQL script if different from the default name SFHub.
c. Select the 'SQL Scripts Destination Folder' ... (ellipsis) button and select the appropriate folder.
d. Click the Download SQL Script button to download the SQL scripts that needs to be executed on the selected SQL server instance. The installer understands the required scripts that need to be executed.
When the download completes, you receive a confirmation message; click Ok.
SQL Scripts successfully downloaded

Navigate to the 'SQL Scripts destination folder' you selected.
Locate and Unzip the file SFHub_SQL.zip.
Execute all the .sql files on the selected SQL Server instance, respecting the numeric order in the files name.
Click Next to open the License File page.
License File page
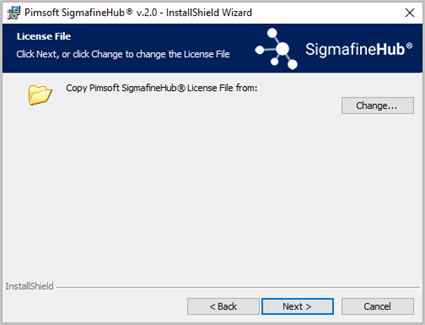
This page requires the file containing the license key to be installed. If your license file is not available, you can skip this step (the license file can be provided later, see Step 4: License).
Click the Change button and select the license file provided by Pimsoft.
NoteAfter clicking Next, if the Sigmafine Client is not already installed on the SFHub server, the following message appears, informing you that the Sigmafine Client will be installed. Click Ok.
Client Installation not found message

Click Next to open the Installation Recap page.
Installation Recap page
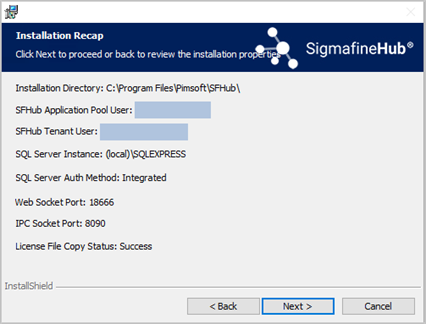
Ensure that the information is correct.
Click Next to open the Ready to Install page.
Ready to Install the Program page
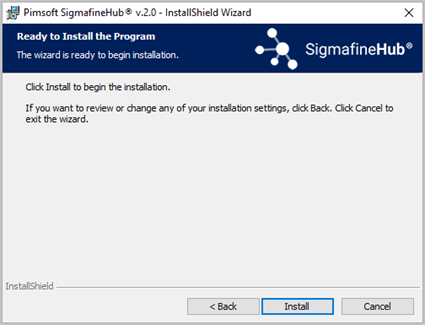
Click Install.
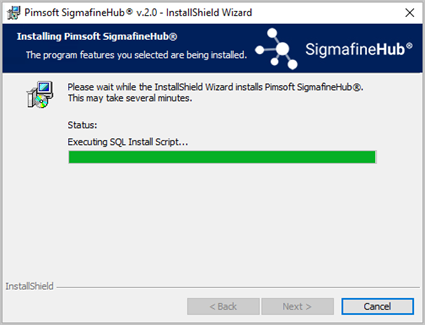
An Installing Pimsoft SigmafineHub page opens showing the progression status of the installation.
Installing Pimsoft SigmafineHub page
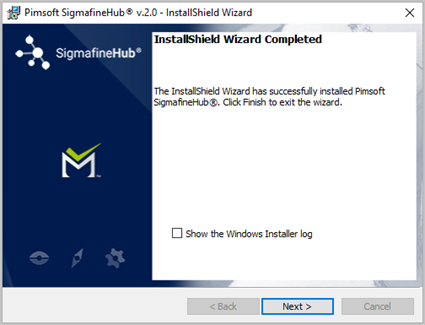
Click Next to open the Installation Completed page.
Installation Completed page
 Note
NoteThe "Show the Windows Installer log" checkbox is visible only if you have
‘Logging’ string key = voicewarmupxin your Windows Registry underComputer\HKEY_LOCAL_MACHINE\SOFTWARE\Policies\Microsoft\Windows\Installer.By checking the Show the Windows Installer log checkbox, the Windows Installer Log opens after you close the last page.
Click Next to open the Post Installation Steps page.\
SFHub Post Installation Steps page
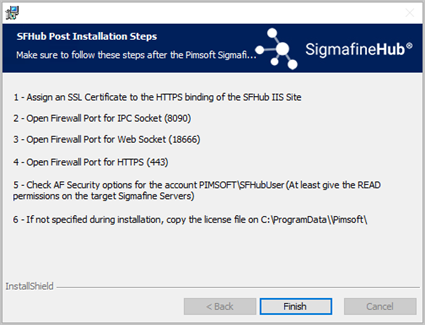
Click Finish to close the page and finish the installation.