Add a User
Only users who are registered on SFHub can access the SFHub applications, such as SFHub Visualizer. In order to register a user, you simply add an account for them and then configure that account for the applications they will need to use. Please note though, that in order to add a user, they must have an existing domain account on your network, as that account is used to allow access to the SFHub web site.
To add a new user:
Log into SFHub as an Administrator.
The SFHub main page opens.
Click on the SigmafineHub® Admin application block to start the SFHub Admin application.
The User Settings panel automatically opens; go directly to step 4.
If you are already in the Administration application, but have a different panel open, go to step 3 to open the User settings panel.
You may be asked to login again. If this happens, just use the same 'Administrator' login credentials as you used in step 1.
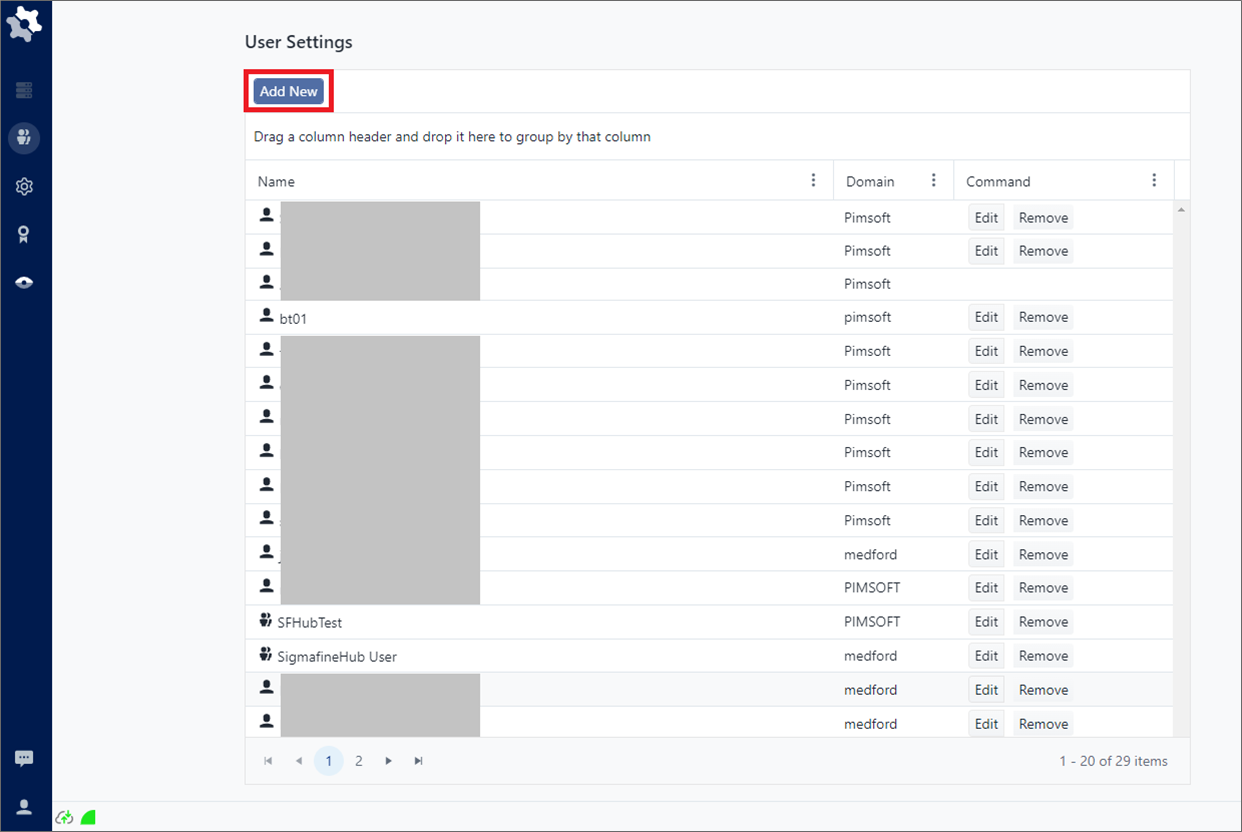
Click the
 User
Settings icon.
User
Settings icon.The User Settings panel opens.
SFHub Admin - User Settings panel
Click on image to enlarge it.
Click the Add New button.
A panel opens displaying two tabs:
Search - Automatically displays the domain users and groups.
Manual - Allows you to enter a user and domain manually.
Add Domain User panel
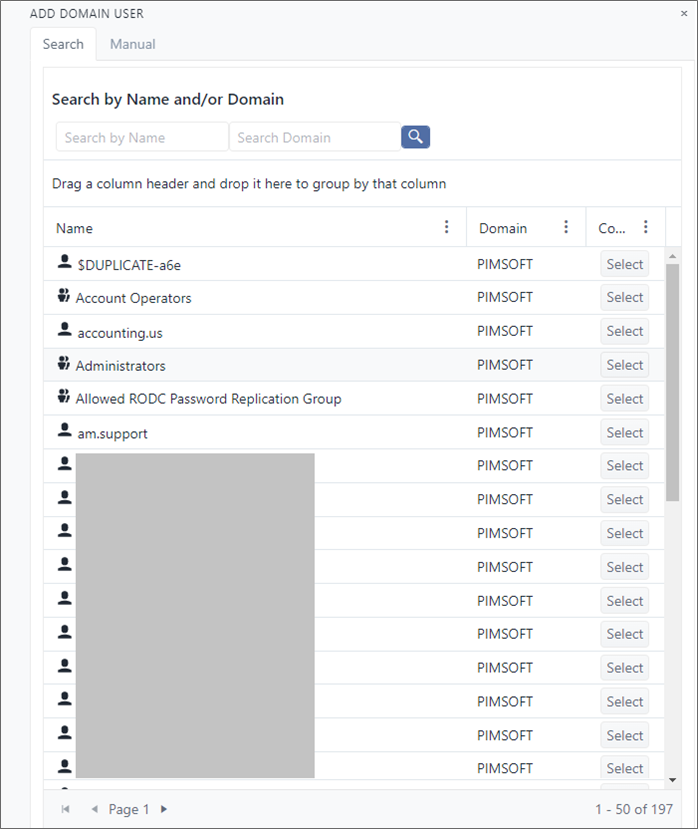
Locate the user name or group name you need to register with SFHub.
If the list is extensive, you can use the 'Search by Name and/or Domain' feature to narrow the scope of the list.
a. Enter one or more characters in the Search by Name and/or Search Domain text boxes.
b. Click the Search button to narrow the list to only those names
matching your search criteria.info
Search button to narrow the list to only those names
matching your search criteria.infoYou can also further narrow the search by using the Filter option available from the vertical ellipsis icon at the right side of a column. See Search By Column Content for details. From the same ellipsis icon, you can also use the Sort features to display the list in ascending or descending order. See Group and Sort Lists for details.
Click the Select button.
A small green panel temporarily displays stating that the user has been added.
Repeat steps 5 and 6 for each user you need to add.
When finished, either click anywhere outside of the panel, or click the x in the top left corner of the panel, to close it.
The name of the user or group you added now displays in the User Settings list panel.
The next step is to configure each newly added user's rights for the SF applications to which they require access. See Configure User Rights for more details.