Step 3: Post Installation
The third step of the installation process focuses on post-installation tasks that are necessary to prepare your Application Server for operation and use.
Assign the Certificate to the SFHub Web Site
The SFHub web site requires that you select and assign an SSL certificate.
- Click Start > Administrative Tools > Internet Information Services (IIS) Manager.
- Browse to your [server name] > Sites and select your SFHub site
- In the Actions panel, click Bindings.
- In the Site Bindings window, select HTTPS.
- From the SSL Certificate drop down, select the Friendly Name for the SSL certificate that will be used for your SFHub site (you can select your own trusted certificate, or the Pimsoft Inc. Self-signed certificate created by the setup).
- Stop and Start the web site.
SQL Server connection
The SFHub Application server supports both SQL Server Authentication (default) and Windows Authentication.
SQL Server Authentication
This is the default connection mode used by the SFHub Application server. With this authentication method, no actions are required.
Windows Authentication (Integrated security)
With Windows Integrated Security, the SFHub Application server connects the SFHub database using the domain account assigned to the SFHub Application Pool.
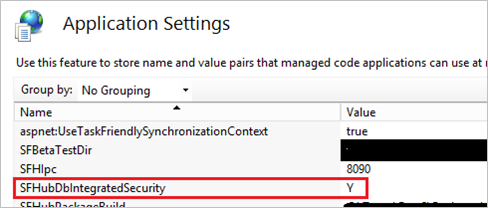
To enable integrated security, modify the SFHubDbIntegratedSecurity application setting by changing it to Y (as shown in the following image).
Application Settings - SFHubDbIntegratedSecurity setting
If needed, additional connection options can be added by editing the SQLServerOptions setting.
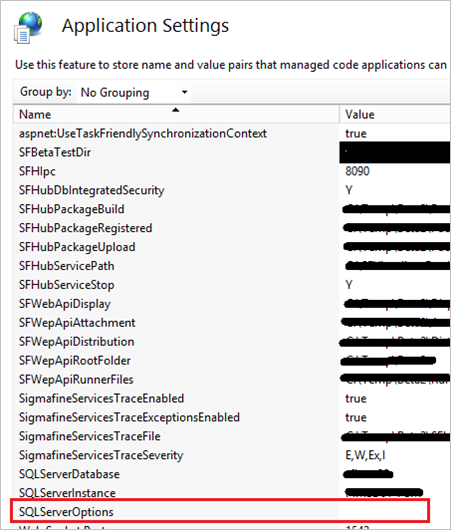
The selected options must follow the OLE Db connection string format and be entered WITHOUT the ";" both at the beginning and end of the string.
Install SF Server Patch
As defined in the Software requirements (see Software Requirements for SFHub Application Server), check the version of every Sigmafine server that will be connected by the SFHub Application Server. If you are not running the Server Service Pack 1 (SF 4.6 R5 SP1 or SF 4.7 SP1), please continue installing the patch:
Download the patch and the installation manual from Sigmafine Support Portal (SSP).
Use the
SigmafineServer4.6R5_Patch_4.6.8.100.EXEfile to upgrade SF 4.6 R5 (4.6.8).Use the
SigmafineServer4.7_Patch_4.7.0.100.EXEfile to upgrade SF Server 4.7 (4.7.0).Install the patch following the installation instruction.
Add SF Servers to the registered servers list
Using PI System Explorer on the SFHub Application Server, verify that all SF Servers you intend to work with are registered. If the list of registered PI AF servers and databases in PI System Explorer does not include the AF server that you want, follow these steps to configure a connection from Application Server to each PI AF server that you plan to use:
Choose File > Connections.
The Servers window opens.
This window lists all the PI Data Archive servers and PI AF servers for which a connection is configured. The currently connected PI Data Archive and PI AF servers are indicated with green circles.
Click Add Asset Server for PI AF server.
In the Server Properties window, enter the name of your PI AF server or PI Data Archive server in the Host field.
Click Connect specifying the SFHubService account (if you did not follow the recommendation to use "SFHubService" as the account, then use the whatever account you defined during the installation).
Remember to grant 'Read' access to the SFHub Service Account and the SFHub users, on each added SF Server.
Configure PI Trust for SFHub
Using the PI System Management tool, configure a trust on each PI Server for the following SFHub services:
W3WP.exe
SFHubStudio.exe
SFHubExec.exe
SFHubExpl.exe
SFHubSearch.exe
SFHubAuth.exe
Example: PI Trust
The following is an example of PI Trust:
Trust Properties - PI Trust
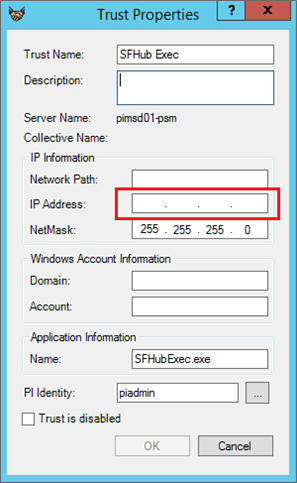
A set of PI Trusts must be configured on each PI Server that SFHub has to access. This applies to not only the Sigmafine Server, but also the PI Server to be referenced by the element attributes.
Grant SigmafineHub Accounts Access
SigmafineHub users are granted PI AF access through their domain accounts. Therefore, you need to configure access for these users on the proper SF Server (PI AF), if you intend to connect through the SFHub Application Server.
Remember that SFHub Visualizer users access SF Server objects, based on the security configured on each SF Server (PI AF).
- Connect to each Sigmafine Server added to the Registered Server List
- Grant Read access to the SFHub Service Account (SFHubService)
- Grant Required rights to all SigmafineHub users. Remember that you can perform this operation later, and any time you add or remove an user through the SFHub Admin application.
Procedure
To grant SigmafineHub accounts access:
Log in on the Sigmafine Server and open the PI System Explorer.
Select File > Connections.
The Servers window opens. This window lists all the PI Data Archive servers and PI AF servers for which a connection is configured. The currently connected PI Data Archive and PI AF servers are indicated by green circles.
In the Servers window, right-click on the PI AF server and select Security.
Assign the required rights to each SigmafineHub users.
Assign 'read' access to the SFHub Service Account (SFHubService).
Do the following on each database, if you want to grant access to only specific ones:
a. On the toolbar, click the Database button. b. In the Select Database window, right-click a database in the Databases list and select Security. c. In the Items to Configure list of the Security Configuration window, ensure that the selected database and every collection in the database is checked. d. Assign the required rights to the selected database for each individual SigmafineHub user ('Read' access to the SFHub Service Account).
Grant SigmafineHub Accounts Access to PI Data Archives
SFHub users may need to access PI Data Archives according to the PI Point Data References configured on the Sigmafine models referenced by the display.
If the PI Data Archive refers to the OEM Sigmafine PI Data Archive, you can create a mapping between a PI user and a Windows group to which the SFHub user belongs.
If the PI Data Archive refers to a different PI Data Archive (e.g., your enterprise PI Server), a PI Trust is required to be configured - one for each PI Data Archive accessed by the Sigmafine models. In such a case, the best approach is to create a PI Trust between the SFHub application and the PI Data Archive server.
The PI Trust can be created using the IP Address and the Net Mask, according to the Windows Server where SFHub is installed and running, and the application name is equal to w3wp.exe.
Install the Display Converter for PI Processbook
Download from the Sigmafine SSP site the setup according to your PI ProcessBook version. Three setups are available:
- SFHub Display Converter Addin for PI Processbook 2014
- SFHub Display Converter Addin for PI Processbook 2015 R2
- SFHub Display Converter Addin for PI Processbook 2015 R3
Uninstall the current Display Converter, if any, from the computer hosting the PI ProcessBook application and install the new version. Now you are ready to convert your PI Processbook displays.
Upload SFHub Symbol Libraries
This step applies only if you are installing SigmafineHub 3.x
SFHub authoring makes available a set of graphic symbols you can use to build your Graphic Templates to be used by SFHub Authoring.
Run SigmafineHub Utility Application installed by the SFHub 3.0 setup kit and select the below item from the main menu.
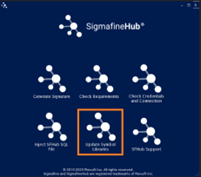
Fill the right parameters to connect the SFHub sql database
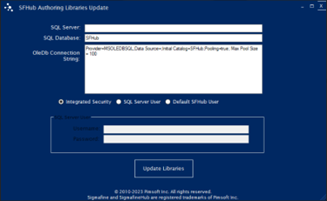
Click on Update Libraries. A confirmation message is shown.
