IMM Utility & Settings
The Sigmafine IMM Utility & Settings feature provides a set of configuration panels to prepare the PI ProcessBook display.
The following table provides descriptions for the various tabs in the Utility & Settings window.
Utility & Settings - Tabs
| Tab | Description |
|---|---|
| Parameters | Allows you to manage the Sigmafine IMM working parameters. |
| Result Table | Allows you to customize the Sigmafine IMM result table (Transfer, Tank, Instruments). |
| Attribute Table | Allows you to customize the Attribute table for each element. |
| Movement Type | Allows you to define the movement type selectable in the Sigmafine IMM add-in. |
| Policy | Allows you to define the Sigmafine IMM access policy for each Sigmafine IMM user. |
| Tank Status | Allows you to customize the color of the Sigmafine IMM Tank Monitoring status. |
| Tank Calculation | Allows you to define the Tank calculation parameters. |
| Tank Consistency Status | Allows you to define the possible Tank Consistency status. |
| Tools | Composition Tracking Init: Allows you to load the composition tracking for Tank and PIPELINE. |
Parameters
The Parameters tab allows you to configure all of the working parameters of Sigmafine IMM. We recommend using the IMM Configuration application to configure the parameters.
To configure working parameters:
Click on the Parameters tab to display the parameters configuration.
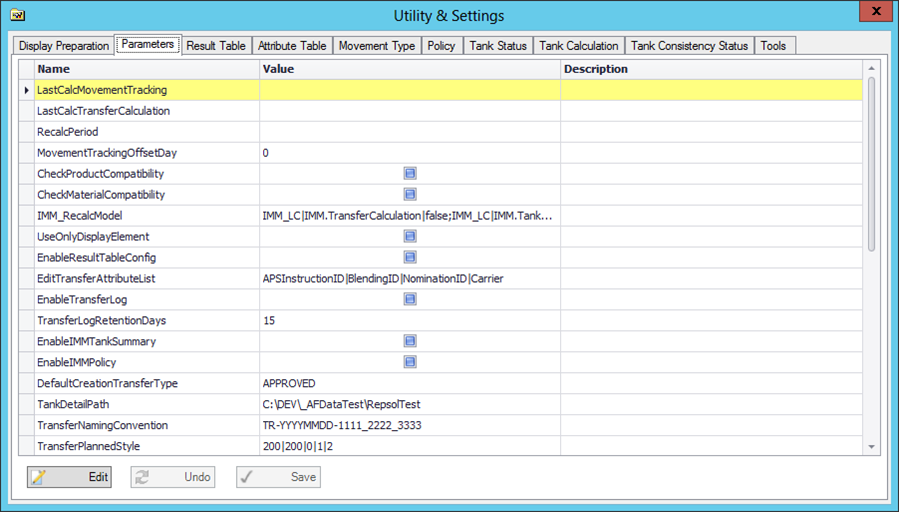
Click the Edit button to allow for editing of value configurations.
If you are editing the ‘EditTransferAttributeList’ Parameter see here for special instructions on modifying this parameter.
Make your value configuration changes.
Click the Save button to save your changes.
If you do not wish to save your changes, click the Undo button.
Edit the ‘EditTransferAttributeList’ Parameter
You can edit the ‘EditTransferAttributeList’ parameter so that it allows you to customize the list of transfer attributes that can be modified in the transfer edit window.
To edit the EditTransferAttributeList parameter:
In the ‘EditTransferAttributeList’ row, click in the Value column.
A drop-down list is opens, showing the attributes you can choose (see following figure):
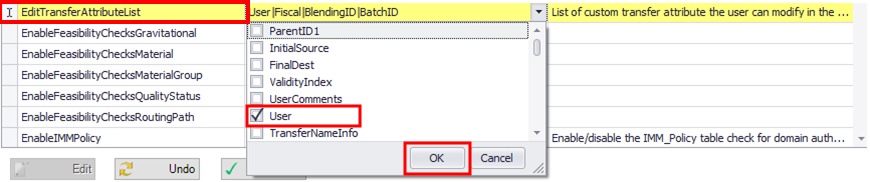
Check the box next to the value you want to choose.
Click OK to save your choice and close the drop-down list.
A Mandatory Attributes window opens.
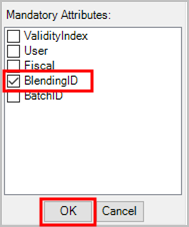
Check the attribute(s) that you want to be mandatory.
Click OK to save your choice(s) and close the Mandatory Attributes window.
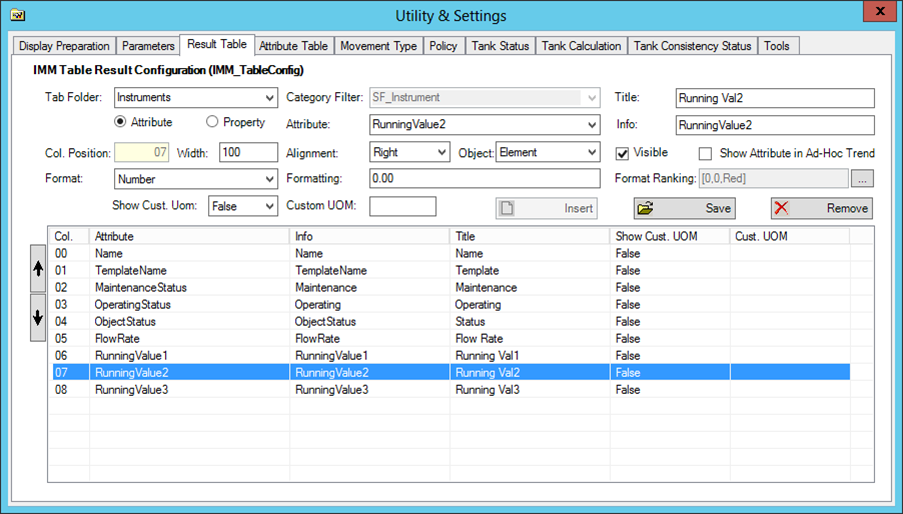
Result Table
The Result Table tab allows you to customize the Sigmafine IMM Results table number of columns (shown in the following figure) and the formats for each tab (Transfer, Tank, and Instruments).
Results Table data structure example
To customize the Result table:
Click on the Result Table tab to display the Result table configuration.
On the Result Table tab, you can insert new columns and remove existing columns in the table.
Click the Insert button to add a new column.
Click the Remove button to remove a column from the table.
Click the Save button to save your changes.
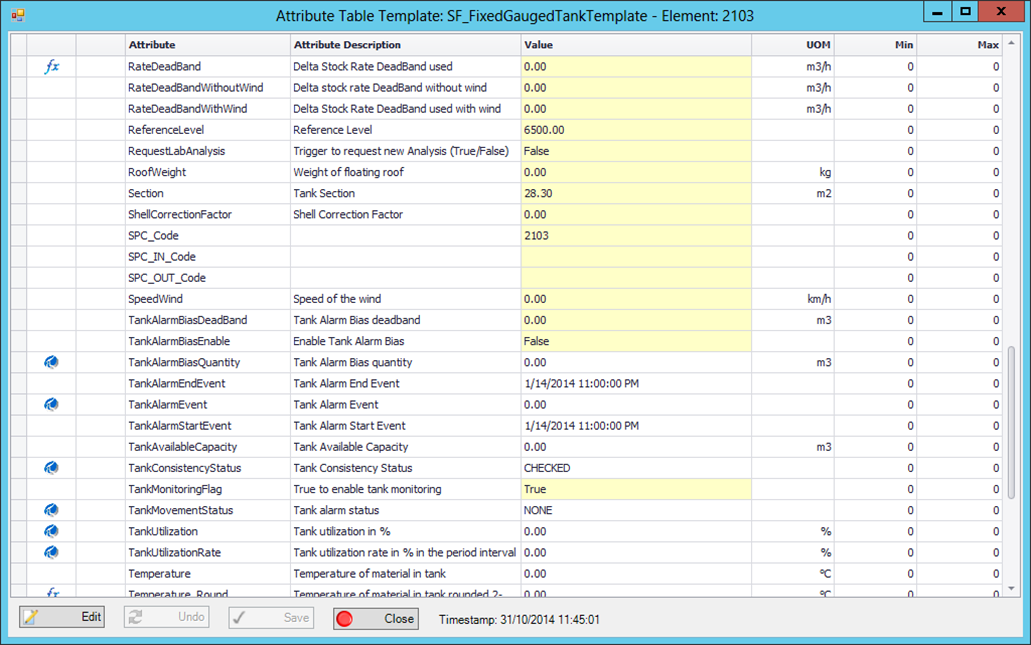
Attribute Table
The Attribute Table allows you to customize the information shown for the elements (Transfer, Tank, Instrument) in the Attribute Table.
Attribute Table data structure example
To customize the Attribute table:
Click on the Attribute Table tab to display the Attribute table configuration.
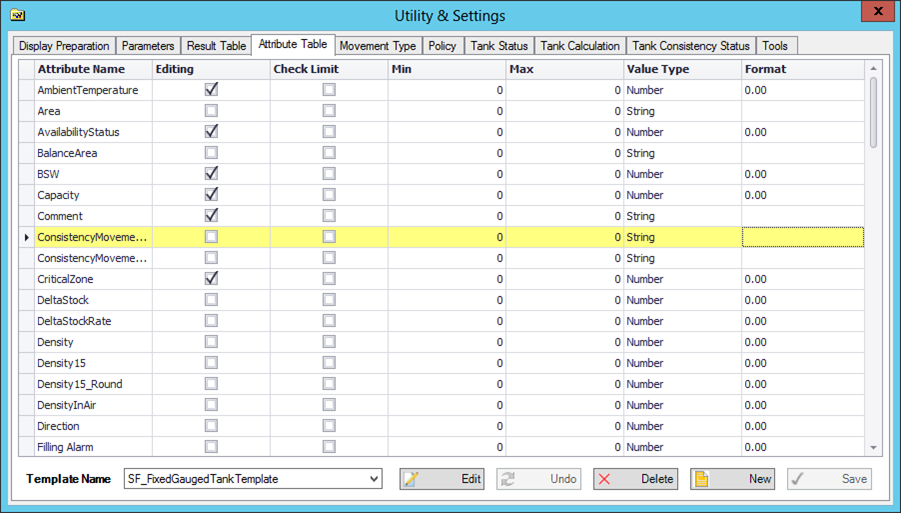
On the Attribute Table tab, you can to change the format for each attribute, allow or deny edit options, and set the check input limit (Mix and Max)
Click the Edit button to add a new column.
Click the New button to add a new attribute.
Click the Delete button to remove an Attribute from the list.
Click the Save button to save your changes.
If you do not want to save your changes, click the Undo button to discard them.
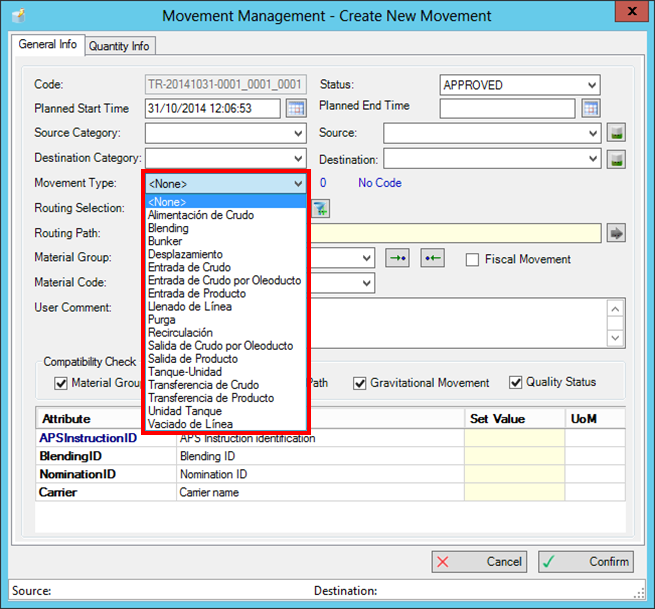
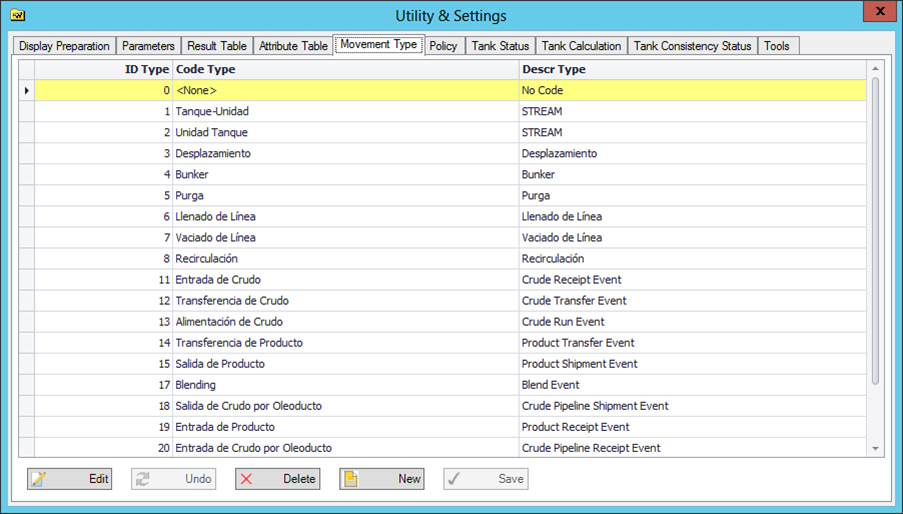
Movement Type
The Movement Type tab allows you to customize the 'Movement Type' list in the Movement Management window.
Movement Type list in the Movement Management window
To customize the Movement Type list:
Click on the Movement Type tab to display the Movement Type list configuration.
Click the Edit button to modify an entry in the list.
Click the New button to add a new entry to the list.
Click the Delete button to remove an existing entry from the list.
Click the Save button to save your changes.
If you do not want to save your changes, click the Undo button to discard them.
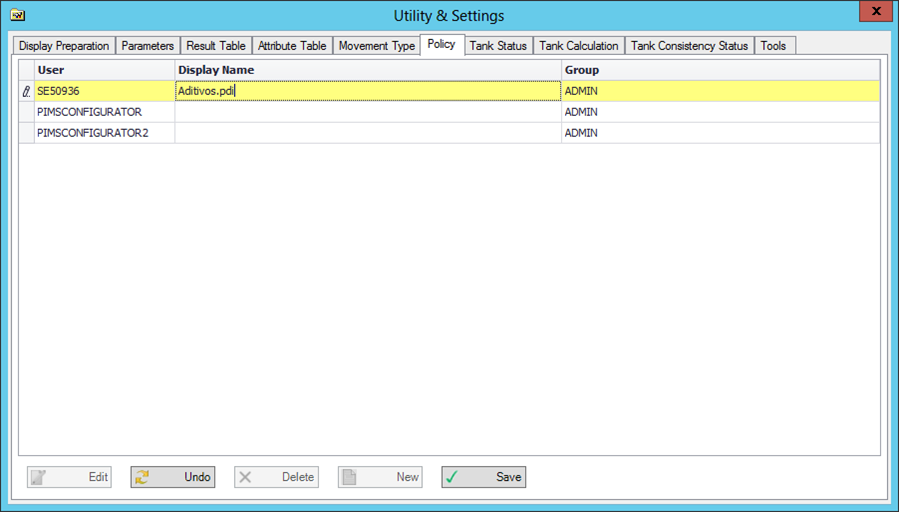
Policy
The Policy tab allows you to define the authentication role for each user that works with Sigmafine IMM.
Prior to working with authentication roles, use the IIS tool to verify that the IMM web application is set to 'Windows Authentication' and that NTLM is the only 'Provider' defined.
To define authentication roles:
Click on the Policy tab to display the Policy configuration.
Click the Edit button to change a user's authorization.
Click the Delete button to remove an existing user.
Click the New button to add a new user.
Click the Save button to save your changes.
If you do not want to save your changes, click the Undo button to discard them.
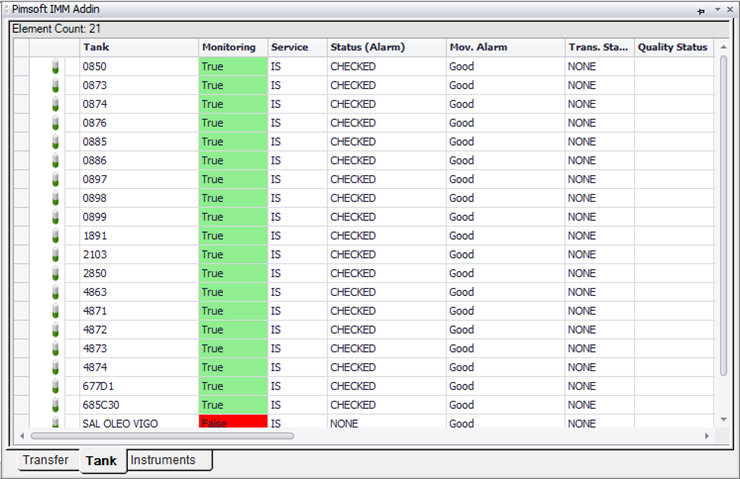
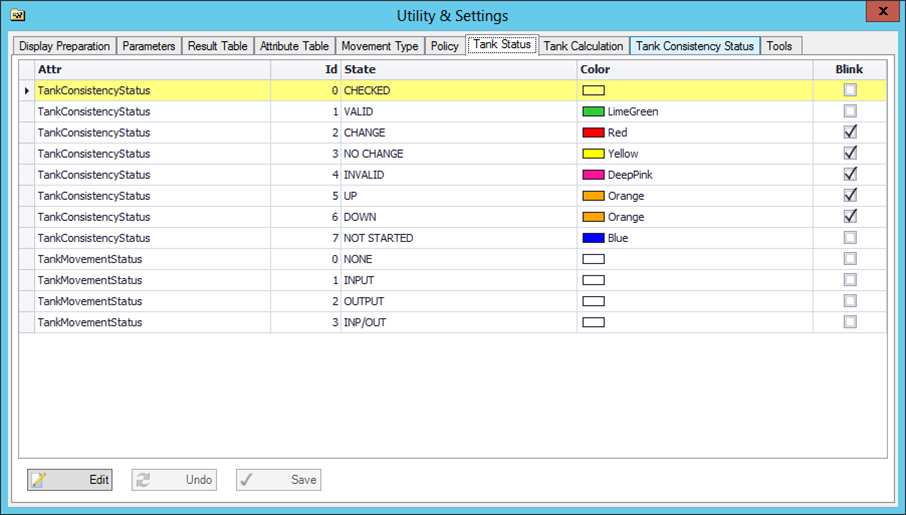
Tank Status
The Tank Status tab allows you to change the color of the Tank based on the Sigmafine IMM Tank Monitoring status.
To change the color of a tank:
Click on the Tank Status tab to display the tank status color configurations.
Click the Edit button to change the Sigmafine IMM Tank monitoring Color Status.
Click the Save button to save your changes.
If you do not want to save your changes, click the Undo button to discard them.
Tank Calculation
The Tank Calculation tab allows you to customize the quantity information that displays on the 'Quantity Info' tab of the 'Create Transfer' page.
Tank Calculation quantity information for Transfers
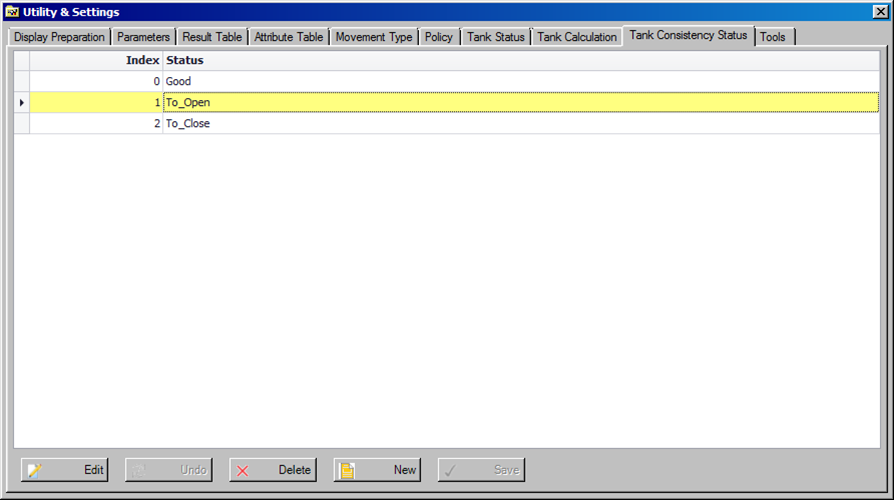
Tank Consistency Status
The Tank Consistency Status Tab allows you to customize the state name for the 'TankConsistencyStatus' attribute.
To change the state name:
- Click on the Tank Consistency Status tab to display the tank consistency status configuration.
Click the Edit button to change the state name.
Click the Save button to save your changes.
If you do not want to save your changes, click the Undo button to discard them.
Tools
The Composition Tracking Init feature on the Tools tab allows you to initialize the composition table for the tank and pipeline.
To initialize the composition table:
Click on the Settings button to open the Utility & Settings window.
Click on the Tools tab to display the Composition Tracking Init tab.
In the File Path box, type the path to the .csv file that contains the component configuration, or click the (ellipsis) button to locate and select the file.
The selected .csv file must match the following format:
Row 1, column A should contain the word "TimeStamp" and column B should contain the end time-stamp in mm/dd/yyyy 00:00 format.
Row 2 and all remaining rows should contain the following data:
Column A: Tank name
Column B: Sequence number of the material packet
Column C: Material code
Column D: Mass, according to the Unit of Measure of the attribute 'ReconciledMass'
Column E: Not meaningful
Add Examples
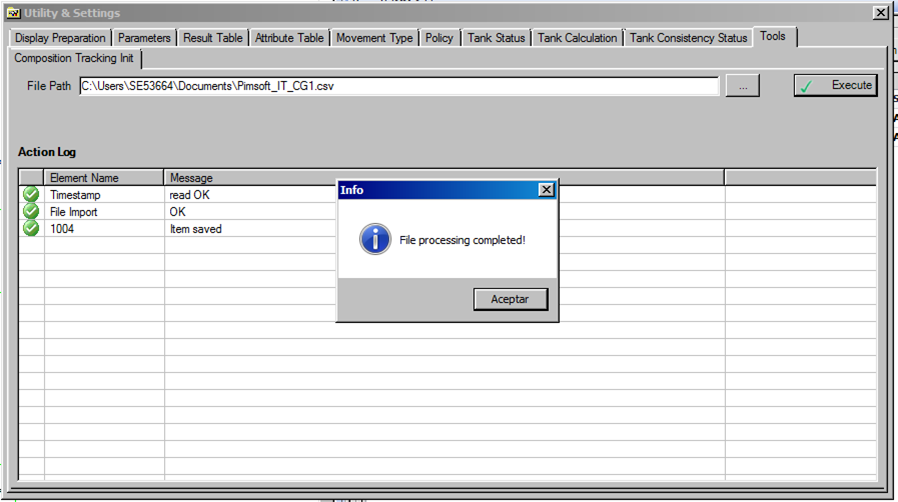
ClosedEXAMPLE: .csv File Format ClosedEXAMPLE: File Format when Displayed in NotepadClick on the Execute button to start loading the composition.
When the process completes, an Info message window opens stating that the file processing has completed (as shown in Figure 1647).
Click OK in the Info message window to close it.
The log containing the processing information is displayed.