Install Procedure
The following steps contain instructions on the installation and initial configuration you need to perform in order for the Web Server to run Sigmafine WebServices successfully. Prior to doing the install, please review the Important Installation Notes below.
Important Installation Notes
For DIRECTORY SECURITY, disable the ANONYMOUS AUTHENTICATION.
This ensures that a valid windows user is able to communicate with AF, because AF 2.x requires authentication.
In case of Kerberos authentication, please review Microsoft documentation about Kerberos and IIS settings.
Ensure that the .NET Runtime execution is set to .NET Framework 4.x. If deployed in an x86 environment, check the 32 bits execution check box (flag) in IIS.
If WSA is installed within a MOSS (Microsoft Office SharePoint Server) web server machine, bindings must be on a different website than the SharePoint one (this is a known limitation of a SharePoint environment).
Install WSA
To install and set the initial configuration of WSA:
Log onto the Web Server using an administrative account (we suggest using the local administrator account).
Ensure that all applications that may have been running on the Web Server are closed.
Unzip the
Pimsoft.Sigmafine.WebService.zipfile to a directory on the C drive of the Web Server.Once unpacked, all the files needed for SF-WSA are installed on the system and the directory structure used to run the Sigmafine WebServices is created. That directory structure is as follows:
\<INSTALLATION DIRECTORY>\ - is the main installation/product folder
Pimsoft.Sigmafine.WebService.asmx
PrecompiledApp.config
web.config
\BIN - is the main ASP.NET binaries folder
App_Code.compiled
App_Code.dll
App_global.asax.compiled
App_global.asax.dll
Pimsoft.Licensing.dll
Copy the license file of the Sigmafine WebServices to the
C:\WINDOWS\SYSTEM32directory.Click the Windows Start icon and open the Windows Control Panel.
Select Administrative Tools > Internet Information Services (IIS) Manager.
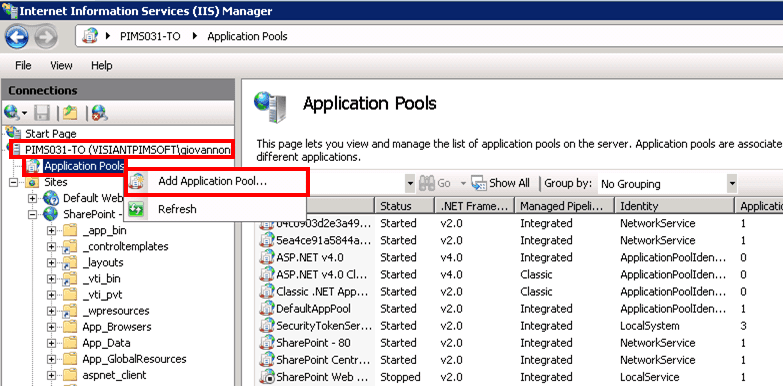
Find and select \<your server> then Application Pools.
Right-click on Application Pools and select Add Application Pool.
The Add Application Pool window opens.

In the Add Application Pool window, enter the following information:
- Name: Type in SigmafineAppPool.
- .NET Framework version: Select .Net Framework v4.0.30319 (or higher, if you have installed a higher version).
- Managed pipeline mode: Select Integrated.
- Start application pool immediately : Check the check box.
Click OK to save your settings and close the Add Application Pool window.
The Application Pools panel is updated with the application pool you just added.
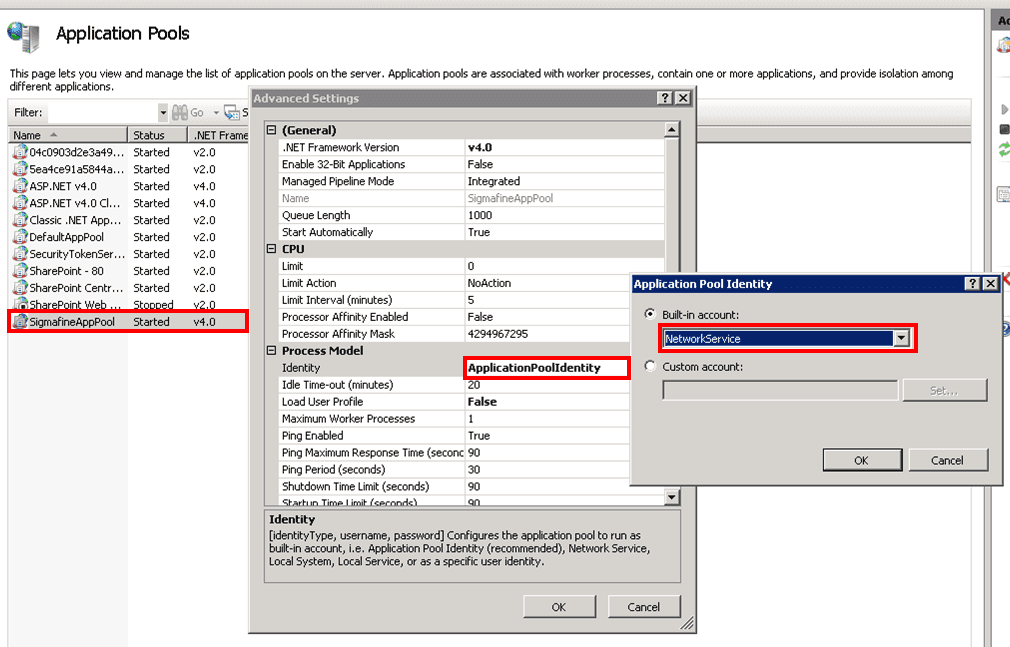
In the Application Pools panel, select the newly created SigmafineAppPool item.
Right-click on SigmafineAppPool and select Advanced Properties, to open the Advanced Settings window.
In the Advanced Settings window, select the current Identity item and change the setting to NetworkService, as shown in Figure 1808.
Click OK to save your selection and close the Application Pool Identity window.
Click OK in the Advanced Settings window to save the setting and close the window.
Now you are ready to add the Web Site.
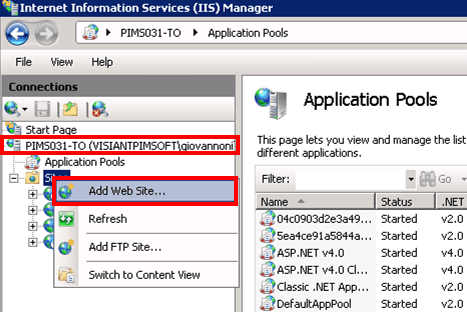
Under Connections, select \<your server>.
Locate the Sites folder.
Right-click on Sites and select Add Web Site.
The Add Web Site window opens.
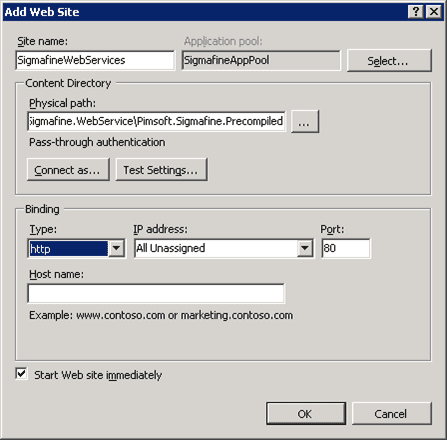
In the Add Web Site window, enter the following information:
- Site name: Type in SigmafineWebServices.
- Application pool: Click the Select and choose the SigmafineAppPool (the application pool you just added).
- Physical path: Click the ... ellipsis button to browse to the main installation folder, and select it.
- Binding: Select the parameters according to your needs (if port 80 is already used select another port).
- Start Web site immediately: Check the check box.
Click OK to save the new Web Site and close the Add Web Site window.
You are ready to perform the last step in the process; editing the
web.configfile.Go to the installation directory and open the
web.configfile.Make a back-up copy of the file first, in case you inadvertently mistype something or if errors occur.
In the
web.configfile, edit the initialization parameters according to the specifications indicated in the Configuration File found in the Appendix.Once completed, you can test the newly create Web Site by following these steps:
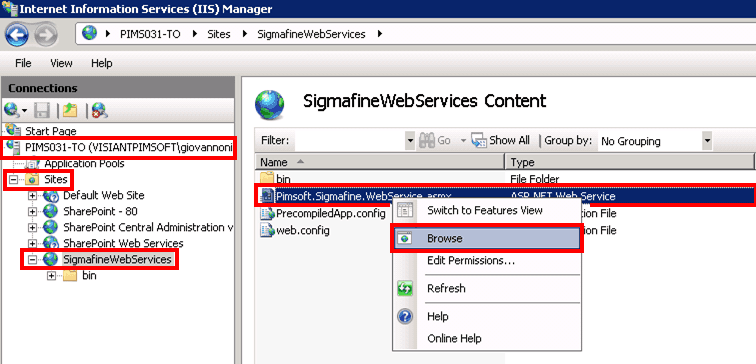
Under Connections, open the Sites folder and select the new web site.
Switch to Content View (seen at the bottom of the form).
Right-click on Pimsoft.Sigmafine.WebService.asmx, and select Browse.
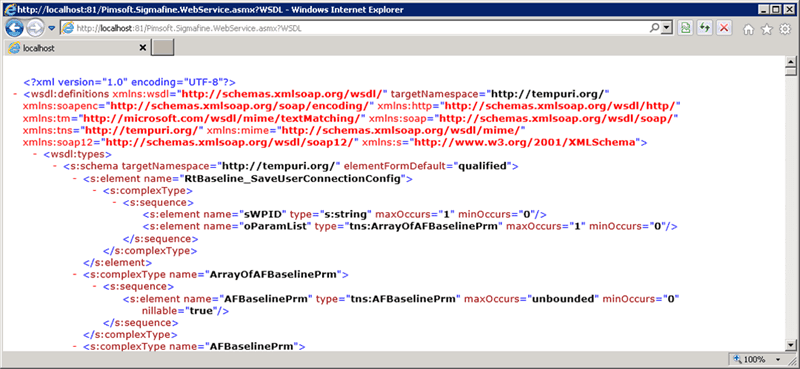
As soon as the server loads the Web Service, the test page is displayed.
Click the Service Description hyperlink and verify that the WSDL is created as expected, as shown in the following example.