Create Transfer
One of the main functions of the Sigmafine IMM Add-In is the ability to create and configure new transfers (movements). Creating a new transfer action involves two main steps:
General Information
The first step in creating a new transfer action is to setup the transfer's general information in the Transfer Management - New Transfer window, under the 'General Info' tab.
To setup the general information:
Click the create button in the upper right corner of the Transfer Manager.

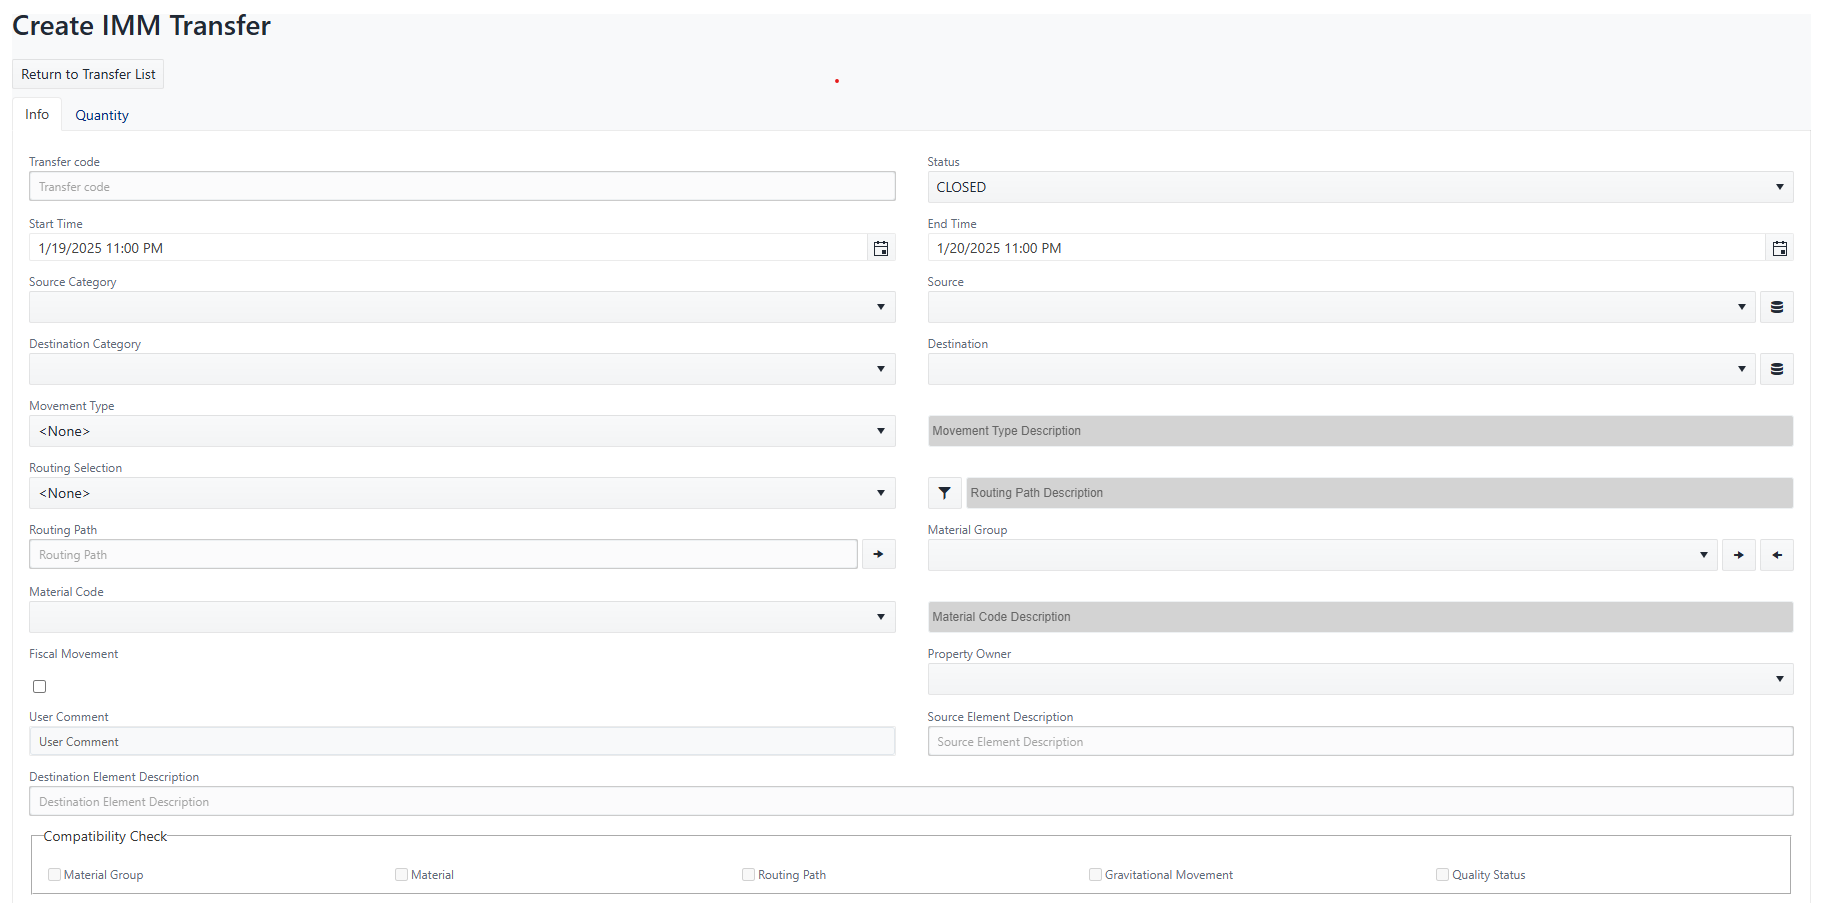
The "Create Transfer" page will be shown. This page consists of two tabs, 'Info' and 'Quantity', both of which contain information that must be compiled with the transfer related information.
 note
noteYou must setup all the pertinent general information prior to setting up the quantity information. The following steps apply to the setup of the general information only. Steps for the quantity information follow in the next section Quantity Information.
Click on the Status dropdown and select the status for this transfer. Available options are:
- Planned - Transfer planned; needs to be approved.
- Approved - Transfer not yet started but ready to be activated.
- Active - Transfer started and not yet closed; it is in the running state.
- Closed - Transfer finished and closed.
- Validated - Transfer closed, approved and not editable.
Click on the Start Time
 calendar button and select the planned start time of the transfer.
The 'Start Time' date and time must be set for a future date for both Approved and Planned transfer statuses. If you enter a past date and time, you will receive a warning message.
noteIn lieu of using the calendar button, you can type the planned start time in the box using mm/dd/yyyy 00:00:00 AM(or PM) format.
Click on the End Time
calendar button and select the planned end time for the transfer.The 'End Time' date and time must be set for an Approved or Planned transfer status, and defined with a future date. If you enter a past date and time, or one that falls before the Planned Start Time, you will receive a warning message.
noteIn lieu of using the calendar button, you can type the planned start time in the box using mm/dd/yyyy 00:00:00 AM(or PM) format.
Click on the Source Category dropdown and select the category of the source element (eg. SF_Node, SF_ReceiptPoint or SF_Tank).
