Creating Transfers in the PI System Explorer
To create a new transfer:
- Open System Explorer.
- In the navigation pane, click Event Frames to display the Event Frames panes.
- Use one of the following methods to start the creation of a new transfer:
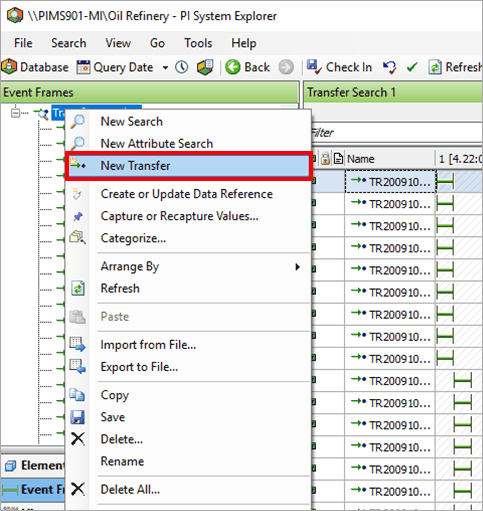
In the Event Frames tree view, right-click on Transfers and select New Transfer from the pop-up menu.
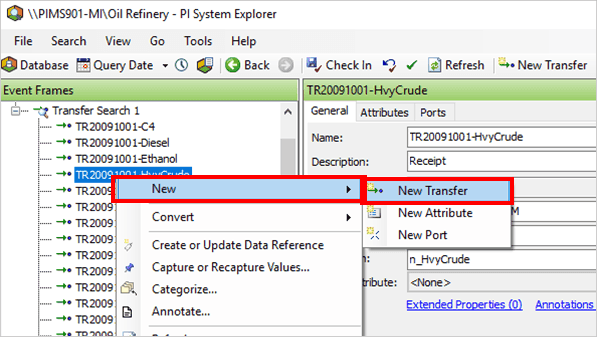
In the Event Frames tree view, right-click on any one of the transfers and select New > New Transfer from the pop-up menu.
Click on the New Transfer button on the toolbar.
The Choose Transfer Template window opens.


Select the appropriate transfer template.
Click OK to save your selection and close the Choose Transfer Template window.
You are returned to the System Explorer in which the selected template displays in the right-side pane.
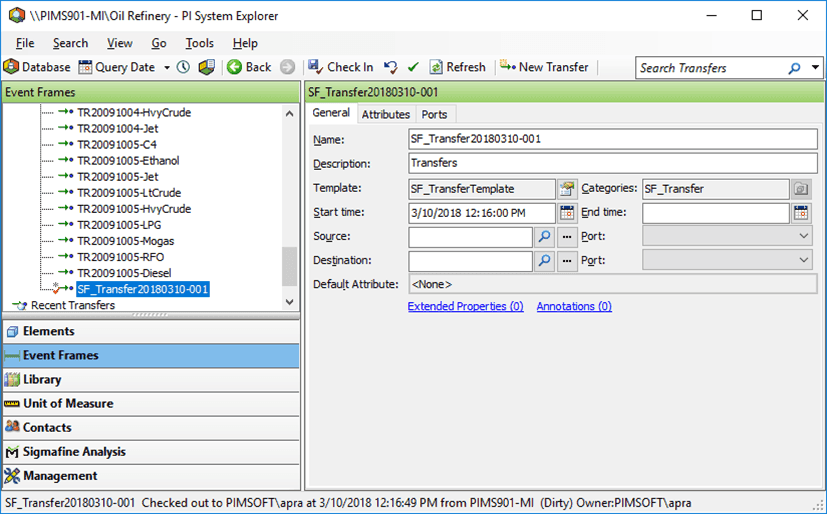
In the right pane, select the General tab (if not already displaying.)
In the Name box, type a name for the new transfer.
In the Source box, type the location from which the transfer is being sourced.
You can also use the Ellipsis or Search buttons to find and select the source location.
In the Destination box, type the location where the transfer is going.
You can also use the Ellipsis or Search button to find and select the destination location.
The new transfer is added to the Transfers list in the Event Frames tree view, as shown in Figure 130.