Creating Elements in Bulk Using PI Builder
It can be advantageous to configure similar elements in a bulk fashion before connecting them together. It is often easier to obtain configuration data of tanks, meters, and process information and import them into a spreadsheet format, instead of configuring them individually through dialog boxes. For example, if you have 1000 flow meters to create, and they all have similar attributes, creating the elements all at once is a faster method. Similarly, updating Attributes for many similar objects at once is better in a bulk editing tool.
The PI Builder by OSIsoft is an add-in to Microsoft Excel created for this purpose. You use it to choose similar elements (based on the same Element template) and modify Attributes of the selected elements, create, or remove elements in the database. Below is a quick example given on how to import and export elements using AF Builder. For more information about the PI AF Builder see the "PI AF Builder User Guide."
To create a series of elements:
In System Explorer, create an example Element that is to be created in bulk.
In our example, we used the 'SF_FlowTemplate' to create a flow 'SF_Flow1' element.
In Excel, open a new worksheet and click on the PI Builder tab.
If the PI Builder tab is not available on the menu bar, you will need to install it using the instructions 'PI AF Builder' in the "PI AF Building User Manual."
Import the Element you created:
On the PI Builder menu, select Elements > Find Elements to open the Element Search window.
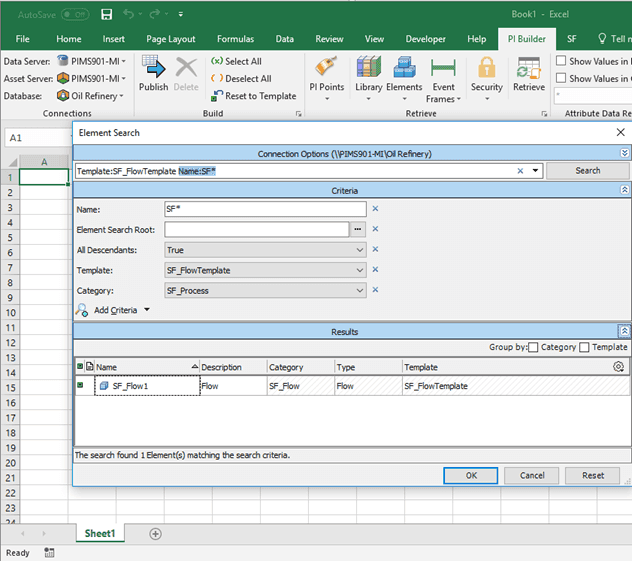
Use the search options to search for the Element that is to be imported.
Click on the Element to select it.
Click OK to close the Element Search window.
The Select Object Type and Column Headers window.
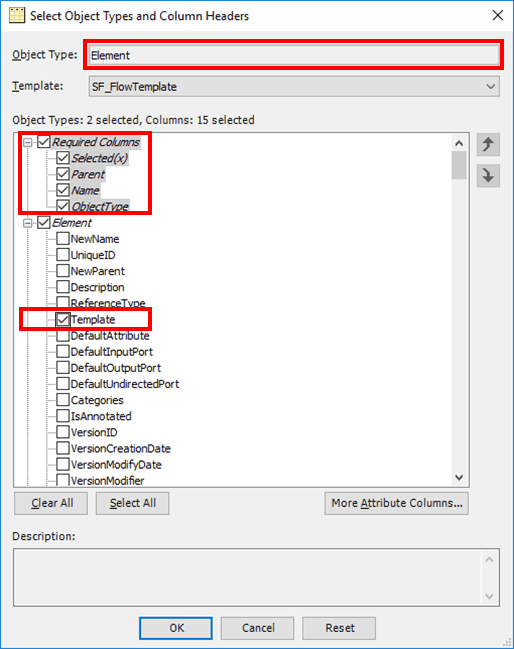
Ensure that the Object Type is displaying 'Element'.
Ensure that the Columns list shows that all Required Columns are selected (checked) and under Element, that Template is selected (checked).
(Optional) If you want to change particular Attributes of these Elements:
Click the
 More Attribute Columns... button to open the Select Attributes window.
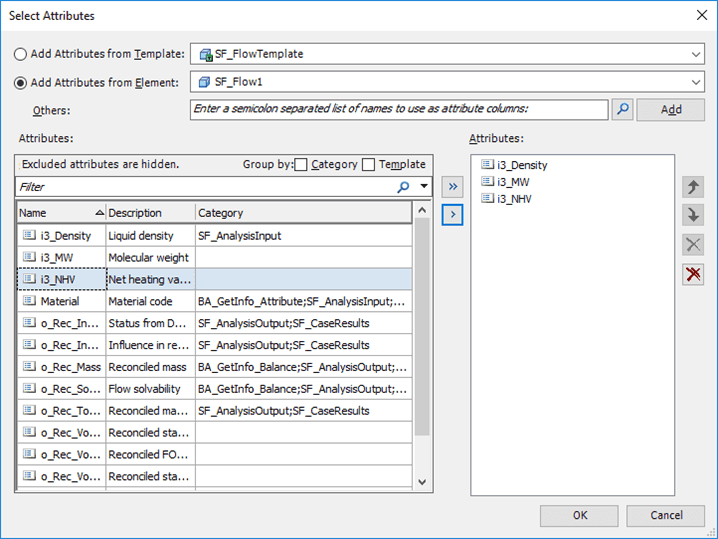
Select the Attributes you want to import and click the
 Add button to add them to the list on the right.
After all Attributes have been selected, click OK to save them and close the Select Attributes window.
You are returned to the Select Object Types and Column Headers window in which the Attributes you selected have been added.
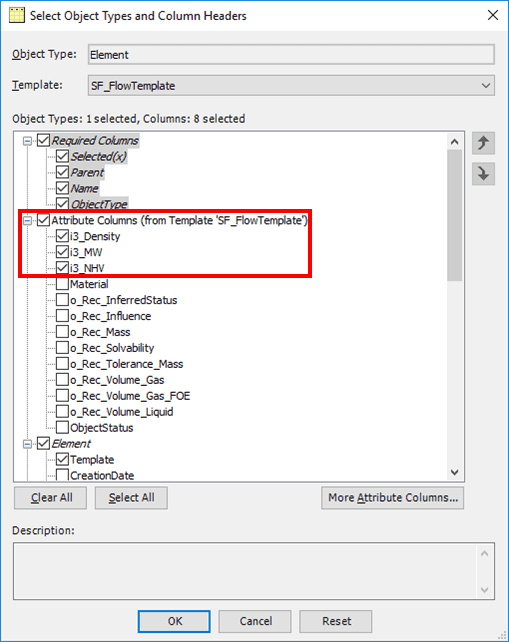
Under Attribute Columns, ensure that the Attributes you had selected are all checked.
Click OK to save the selections and close the Select Object Types and Column Headers window.
The Retrieve Selected Objects window opens showing the confirmation log.

Click Close to close the Retrieve Selected Objects window.
The spreadsheet is filled in with the element's details, selected Attributes and the respective headers as shown in Figure 121.

Either copy and paste the row of the example element, or drag it down, so that the other rows get filled with the example Element data.
Assign the Element names as needed.
(Optional) Edit the Attributes and configured Data References for the elements.
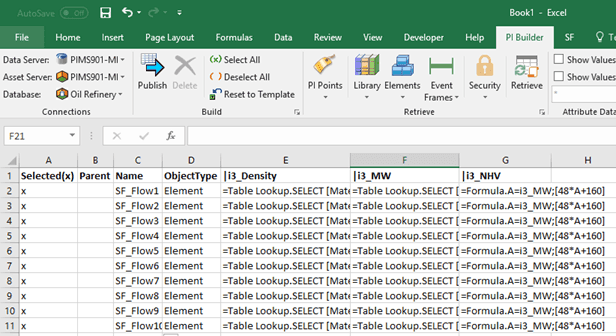
Note: All elements with an 'x' in the Selected(x) column will be exported.
When you are satisfied with the changes in the spreadsheet, click Publish on the PI Builder menu.
The Publish Options window opens.

Click the Edit Mode down-arrow and select mode to use.
We recommend selecting Create and Edit most of the time for this type of scenario, as it created the elements that do not exist and edits the ones that exist but have some new changes. Only in very specific situations, might you need to use one of the other modes.
Click OK to save your selection and close the window.
The Publish Selected Objects window opens, showing the list of elements published.
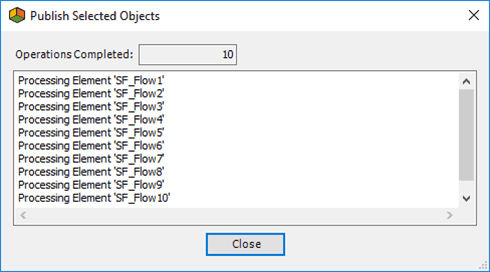
In publishing, the selected elements are created and automatically checked-in.
Click Close to close the Publish Selected Objects window.
(Optional) To verify that all the elements have been checked-in:
Open System Explorer.
In the navigation pane, select Elements.
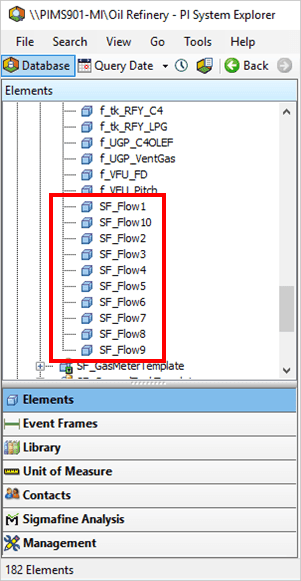
The new elements are listed in the Elements tree view.
Note: After you become familiar with the format of the configuration string of Data References, you can save time in configuration by not using the configuration dialog boxes. To do this, copy and paste a result to another column or row and change the data reference string to the appropriate value. The Excel string concatenation function (using "=CONCATENATE()" ) can also be used to aid in the construction of the configuration string.